本文使用「署名 4.0 国际 (CC BY 4.0)」许可协议,欢迎转载、或重新修改使用,但需要注明来源。 [署名 4.0 国际 (CC BY 4.0)](https://creativecommons.org/licenses/by/4.0/deed.zh)

本文作者: 苏洋

创建时间: 2024年12月01日
统计字数: 14005字
阅读时间: 28分钟阅读
本文链接: https://soulteary.com/2024/12/01/use-open-source-software-to-build-a-lightweight-npm-private-repository-verdaccio.html

-----


# 使用开源软件搭建轻量的 NPM 私有仓库:Verdaccio

本篇内容,我们来聊聊使用开源软件 Verdaccio 搭建轻量的 NPM 私有仓库。

## 写在前面

最近折腾项目,经常遇到需要进行前端构建的需求。

其实在几年前,也因为 CI/CD 的需求,写过一些和[软件仓库相关的实践](https://soulteary.com/tags/%e8%bd%af%e4%bb%b6%e4%bb%93%e5%ba%93.html),不过马上都 2025 年了,或许应有更新、更简单的方案。

## 为什么需要私有 NPM 仓库?

在实际开发中,我们经常会遇到以下场景:

1. 需要管理企业内部的私有包,避免核心代码泄露
2. 希望降低对公共 NPM 仓库的依赖,提升安装速度
3. 想要对第三方包进行定制化修改
4. 需要在内网环境下确保依赖包的可用性

Verdaccio 恰好能够完美解决这些问题。

### 关于轻量级 NPM 开源仓库:Verdaccio

[Verdaccio](https://github.com/verdaccio/verdaccio) 是一个轻量级的私有 NPM 包管理工具,项目创建以来接受了来自 docker、crowdin、netlify、jetbrains、algolia、SheetJs、GatsbyJs、pintura 等知名项目和组织的支持。

核心特点:
1. 零配置开箱即用,自带轻量级数据库,不需要额外的数据库支持
2. 支持代理和缓存公共仓库(npmjs.org),可以加快包的下载速度
3. 内置用户认证和私有包权限管理,适合企业和团队内部使用
4. 支持扩展存储方案,可以对接 S3、Google Cloud Storage 等
5. 适合用于前端项目的端到端测试
6. 资源占用少,易于部署和维护

主要使用场景:
1. 企业私有包管理:比如公司内部的通用组件库、工具库等,可以通过 Verdaccio 进行私密发布和管理,避免将源码发布到公网。
2. 加速包下载:通过缓存机制,只需从公共仓库下载一次包,后续可直接使用本地缓存,大大提升安装速度。
3. 离线开发环境:在内网环境下,可以使用 Verdaccio 搭建本地仓库,确保依赖包的可用性。
4. 测试和调试:很多开源项目如 create-react-app、babel.js 等都使用 Verdaccio 进行端到端测试。

软件的基本使用方法:

```bash
# 私有仓库服务端
# 安装
npm install -g verdaccio
# 启动服务
verdaccio


# 用户端使用
# 配置 registry
npm set registry http://localhost:4873/
# 创建用户
npm adduser --registry http://localhost:4873
# 发布包
npm publish --registry http://localhost:4873
```

Verdaccio 的特点是轻量、简单、易用,特别适合中小型团队使用。它不仅可以管理私有包,还能作为公共 NPM 仓库的缓存层,提升团队的开发效率。

## 实践部署:面向本地开发场景

因为 Verdaccio 足够轻量,所以除了能够服务私有网络中的开发之外,还可以实现本地开发前端项目时的依赖包安装加速。

### 1. 基础环境准备

首先,确保服务器已安装 Node.js 18 或更高版本:

```bash
# 确认版本
# node -v

v22.11.0
```

我使用的是 `v22.11.0` 版本的 Node.js,如果你已经安装了 NVM,可以通过下面的命令,快速下载安装这个版本的 Node.js:

```bash
# NVM_NODEJS_ORG_MIRROR=https://mirrors.tuna.tsinghua.edu.cn/nodejs-release/ nvm install v22.11.0

Downloading and installing node v22.11.0...
Downloading https://mirrors.tuna.tsinghua.edu.cn/nodejs-release//v22.11.0/node-v22.11.0-darwin-arm64.tar.xz...
################################################################################################################ 100.0%
Computing checksum with shasum -a 256
Checksums matched!
Now using node v22.11.0 (npm v10.9.0)
```

然后,将系统中的 Node 版本切换为刚刚下载后的版本:

```bash
# nvm use v22.11.0

Now using node v22.11.0 (npm v10.9.0)

# nvm alias default 22.11.0
default -> 22.11.0 (-> v22.11.0)
```

### 2. 安装软件

软件的安装很简单,我们可以借助国内的 NPM 加速镜像来完成工具的下载:

```bash
npm install --registry=https://registry.npmmirror.com -g verdaccio
```

### 3. 使用软件

想要使用软件,只需要执行 `verdaccio` 这个命令:

```bash
# verdaccio

(node:39844) [DEP0040] DeprecationWarning: The `punycode` module is deprecated. Please use a userland alternative instead.
(Use `node --trace-deprecation ...` to show where the warning was created)
info --- config file  - /Users/soulteary/.config/verdaccio/config.yaml
info --- the "crypt" algorithm is deprecated consider switch to "bcrypt" in the configuration file. Read the documentation for additional details
info --- using htpasswd file: /Users/soulteary/.config/verdaccio/htpasswd
info --- plugin successfully loaded: verdaccio-htpasswd
info --- plugin successfully loaded: verdaccio-audit
warn --- http address - http://localhost:4873/ - verdaccio/6.0.2
```

当服务启动后,我们就可以通过访问 `http://localhost:4873/` 来使用它了。
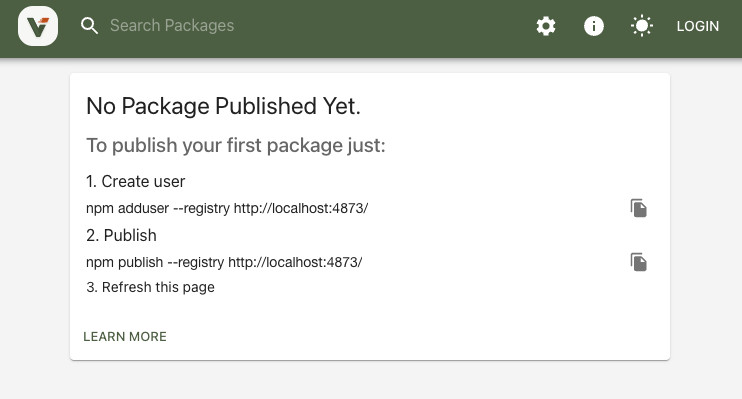
![默认的 WebUI 界面](https://attachment.soulteary.com/2024/12/01/npm-webui.jpg)

### 4. 默认配置

默认情况下,程序会使用系统用户目录中的默认配置,如:

```bash
/Users/soulteary/.config/verdaccio/config.yaml
```

默认配置文件如下(我进行了一些翻译):

```yaml
#
# 这是默认配置文件。
#
# 查看更多配置文件示例:
# https://github.com/verdaccio/verdaccio/tree/6.x/conf
#
# 阅读最佳实践
# https://verdaccio.org/docs/best

# 存储所有包的目录路径
storage: ./storage
# 包含插件的目录路径
plugins: ./plugins

# https://verdaccio.org/docs/webui
web:
  title: Verdaccio
  # 注释此行以禁用 gravatar 支持
  # gravatar: false
  # 默认情况下包按升序排列 (asc|desc)
  # sort_packages: asc
  # 将您的 UI 转换为暗色模式
  # darkMode: true
  # html_cache: true
  # 默认情况下显示所有功能
  # login: true
  # showInfo: true
  # showSettings: true
  # 结合 darkMode,您可以强制使用特定主题
  # showThemeSwitch: true
  # showFooter: true
  # showSearch: true
  # showRaw: true
  # showDownloadTarball: true
  # 在manifest <scripts/> 之后注入的 HTML 标签
  # scriptsBodyAfter:
  #    - '<script type="text/javascript" src="https://my.company.com/customJS.min.js"></script>'
  # 在 </head> 结束前注入的 HTML 标签
  # metaScripts:
  #    - '<script type="text/javascript" src="https://code.jquery.com/jquery-3.5.1.slim.min.js"></script>'
  #    - '<script type="text/javascript" src="https://browser.sentry-cdn.com/5.15.5/bundle.min.js"></script>'
  #    - '<meta name="robots" content="noindex" />'
  # 在 <body/> 的第一个子元素处注入的 HTML 标签
  # bodyBefore:
  #    - '<div id="myId">html before webpack scripts</div>'
  # 模板manifest脚本的公共路径(仅manifest)
  # publicPath: http://somedomain.org/

# https://verdaccio.org/docs/configuration#authentication
auth:
  htpasswd:
    file: ./htpasswd
    # 允许注册的最大用户数,默认为 "+inf"。
    # 您可以将其设置为 -1 以禁用注册。
    # max_users: 1000
    # 哈希算法,可选项为:"bcrypt"、"md5"、"sha1"、"crypt"。
    # algorithm: bcrypt # 默认为 crypt,但建议新安装使用 bcrypt
    # "bcrypt" 的轮数,对其他算法将被忽略。
    # rounds: 10

# https://verdaccio.org/docs/configuration#uplinks
# 可以连接的其他已知仓库列表
uplinks:
  npmjs:
    url: https://registry.npmjs.org/

# 了解如何保护您的包
# https://verdaccio.org/docs/protect-your-dependencies/
# https://verdaccio.org/docs/configuration#packages
packages:
  '@*/*':
    # 作用域包
    access: $all
    publish: $authenticated
    unpublish: $authenticated
    proxy: npmjs

  '**':
    # 允许所有用户(包括未认证用户)读取和发布所有包
    #
    # 您可以指定用户名/组名(取决于您的认证插件)
    # 和三个关键字:"$all"、"$anonymous"、"$authenticated"
    access: $all

    # 允许所有已知用户发布包
    # (默认情况下任何人都可以注册,请注意!)
    publish: $authenticated
    unpublish: $authenticated

    # 如果包在本地不可用,则将请求代理到 'npmjs' 注册表
    proxy: npmjs

# 为提高安全性配置并避免依赖混淆
# 考虑移除私有包的代理属性
# https://verdaccio.org/docs/best#remove-proxy-to-increase-security-at-private-packages

# https://verdaccio.org/docs/configuration#server
# 您可以为传入连接指定 HTTP/1.1 服务器保持活动超时时间(秒)。
# 值为 0 时会使 http 服务器的行为类似于 8.0.0 之前的 Node.js 版本,它们没有保持活动超时。
# 解决方案:通过给定配置,您可以解决以下问题 https://github.com/verdaccio/verdaccio/issues/301。如果 60 不够用,请设置为 0。
server:
  keepAliveTimeout: 60
  # 当 Verdaccio 在代理或负载均衡器后面时,允许 `req.ip` 正确解析
  # 参见:https://expressjs.com/en/guide/behind-proxies.html
  # trustProxy: '127.0.0.1'

# https://verdaccio.org/docs/configuration#offline-publish
# publish:
#   allow_offline: false

# https://verdaccio.org/docs/configuration#url-prefix
# url_prefix: /verdaccio/
# VERDACCIO_PUBLIC_URL='https://somedomain.org';
# url_prefix: '/my_prefix'
# // url -> https://somedomain.org/my_prefix/
# VERDACCIO_PUBLIC_URL='https://somedomain.org';
# url_prefix: '/'
# // url -> https://somedomain.org/
# VERDACCIO_PUBLIC_URL='https://somedomain.org/first_prefix';
# url_prefix: '/second_prefix'
# // url -> https://somedomain.org/second_prefix/'

# https://verdaccio.org/docs/configuration#security
# security:
#   api:
#     legacy: true
#     # 建议为旧安装设置为 true
#     migrateToSecureLegacySignature: true
#     jwt:
#       sign:
#         expiresIn: 29d
#       verify:
#         someProp: [value]
#    web:
#      sign:
#        expiresIn: 1h # 默认为1小时
#      verify:
#         someProp: [value]

# https://verdaccio.org/docs/configuration#user-rate-limit
# userRateLimit:
#   windowMs: 50000
#   max: 1000

# https://verdaccio.org/docs/configuration#max-body-size
# max_body_size: 10mb

# https://verdaccio.org/docs/configuration#listen-port
# listen:
# - localhost:4873            # 默认值
# - http://localhost:4873     # 相同
# - 0.0.0.0:4873             # 监听所有地址 (INADDR_ANY)
# - https://example.org:4873  # 如果您想使用 https
# - "[::1]:4873"             # ipv6
# - unix:/tmp/verdaccio.sock # unix socket

# 如果您不考虑使用 HTTP 代理,HTTPS 配置会很有用
# https://verdaccio.org/docs/configuration#https
# https:
#   key: ./path/verdaccio-key.pem
#   cert: ./path/verdaccio-cert.pem
#   ca: ./path/verdaccio-csr.pem

# https://verdaccio.org/docs/configuration#proxy
# http_proxy: http://something.local/
# https_proxy: https://something.local/

# https://verdaccio.org/docs/configuration#notifications
# notify:
#   method: POST
#   headers: [{ "Content-Type": "application/json" }]
#   endpoint: https://usagge.hipchat.com/v2/room/3729485/notification?auth_token=mySecretToken
#   content: '{"color":"green","message":"New package published: * {{ name }}*","notify":true,"message_format":"text"}'

middlewares:
  audit:
    enabled: true

# https://verdaccio.org/docs/logger
# 日志设置
log: { type: stdout, format: pretty, level: http }
#experiments:
#  # 支持 npm token 命令
#  token: false
#  # 禁止将正文大小写入日志,在票据 1912 中了解更多
#  bytesin_off: false
#  # 启用 tarball URL 重定向,用于在不同服务器托管 tarball,tarball_url_redirect 可以是模板字符串
#  tarball_url_redirect: 'https://mycdn.com/verdaccio/${packageName}/${filename}'
#  # tarball_url_redirect 可以是一个函数,接收 packageName 和 filename 并返回 url,在使用 js 配置文件时
#  tarball_url_redirect(packageName, filename) {
#    const signedUrl = // 生成签名 url
#    return signedUrl;
#  }

# 定制翻译包,api 的 i18n 部分尚不可用
# i18n:
# 可用翻译列表 https://github.com/verdaccio/verdaccio/blob/master/packages/plugins/ui-theme/src/i18n/ABOUT_TRANSLATIONS.md
#   web: en-US
```

### 5. 调整配置

如果我们想实现支持完全离线的仓库,可以将配置调整为下面这样,并保存为 `config.yaml`:

```yaml
# 存储所有包的目录路径
storage: ./storage
# 包含插件的目录路径
plugins: ./plugins

# https://verdaccio.org/docs/webui
web:
  title: Verdaccio
  html_cache: true
  login: true
  showInfo: true
  showSettings: true
  # publicPath: http://somedomain.org/

# https://verdaccio.org/docs/configuration#authentication
auth:
  htpasswd:
    file: ./htpasswd

# https://verdaccio.org/docs/configuration#uplinks
# 可以连接的其他已知仓库列表
uplinks:
  npmmirror:
    url: https://registry.npmmirror.com/
  npmjs:
    url: https://registry.npmjs.org/

# 了解如何保护您的包
# https://verdaccio.org/docs/protect-your-dependencies/
# https://verdaccio.org/docs/configuration#packages
packages:
  '@*/*':
    # 作用域包 (可以考虑删除,提高私密性)
    access: $all
    publish: $authenticated
    unpublish: $authenticated
    # proxy: npmjs
    proxy: npmmirror

  '**':
    # 允许所有用户(包括未认证用户)读取和发布所有包
    # 您可以指定用户名/组名(取决于您的认证插件)
    # 和三个关键字:"$all"、"$anonymous"、"$authenticated"
    access: $all

    # 允许所有已知用户发布包,默认情况下任何人都可以注册
    publish: $authenticated
    unpublish: $authenticated

    # 如果包在本地不可用,则将请求代理到 'npmmirror' 注册表,默认 proxy: npmjs
    proxy: npmmirror

server:
  keepAliveTimeout: 0

security:
  api:
    legacy: true
    migrateToSecureLegacySignature: true

# https://verdaccio.org/docs/configuration#listen-port
listen:
- localhost:4873     # 默认值
- 0.0.0.0:4873       # 监听所有地址 (INADDR_ANY)

middlewares:
  audit:
    enabled: false

# 日志设置
log: { type: stdout, format: pretty, level: http }
```

上面的配置中,将软件包首次下载缓存的地址从默认的 `npmjs` 调整为 `npmmirror`,加速首次软件包的下载。

执行命令,重新启动服务:

```bash
verdaccio -c config.yaml
```

接着,调整 `npm` 下载偏好,让 `npm` 始终从我们的仓库下载软件包:

```bash
npm config set prefer-online true
```

### 6. 验证软件包下载

为了避免本地干扰,我们将本地的缓存和文件锁定都清理掉:

```bash
rm -rf node_modules 
rm -rf package-lock.json 
```

在软件仓库里执行下面的命令,来进行下载验证:

```bash
npm install --registry http://localhost:4873/ --verbose
```

首次软件包下载时,Verdaccio 中因为没有缓存,所以也会连接互联网进行下载:

```bash
# npm install --registry http://localhost:4873/ --verbose
npm verbose cli /Users/soulteary/.nvm/versions/node/v22.11.0/bin/node /Users/soulteary/.nvm/versions/node/v22.11.0/bin/npm
npm info using npm@10.9.0
npm info using node@v22.11.0
npm verbose title npm install
npm verbose argv "install" "--registry" "http://localhost:4873/" "--loglevel" "verbose"
npm verbose logfile logs-max:10 dir:/Users/soulteary/.npm/_logs/2024-11-30T14_18_40_831Z-
npm verbose logfile /Users/soulteary/.npm/_logs/2024-11-30T14_18_40_831Z-debug-0.log
npm http fetch GET 200 http://localhost:4873/chart.js 141ms (cache updated)
npm http fetch GET 200 http://localhost:4873/copy-text-to-clipboard 258ms (cache updated)
npm http fetch GET 200 http://localhost:4873/dayjs 41ms (cache updated)
npm http fetch GET 200 http://localhost:4873/lodash 44ms (cache updated)
...

added 137 packages in 2m

33 packages are looking for funding
  run `npm fund` for details
npm verbose cwd /Users/soulteary/SnowLotus/frontend
npm verbose os Darwin 23.6.0
npm verbose node v22.11.0
npm verbose npm  v10.9.0
npm verbose exit 0
npm info ok
```

第一次完成,时间会比较长,我这里使用了 2 分钟。

接下来,我们再次进行下载验证,为了避免本地干扰,我们将本地的缓存和文件锁定都清理掉:

```bash
rm -rf node_modules
rm -rf package-lock.json
```

能够发现时间缩减到了 7 秒钟。

```bash
added 137 packages in 7s

33 packages are looking for funding
```

最后,我们来模拟 CI/CD 环境中,`package-lock.json` 就绪,`node_modules` 初始化时不存在的场景(仅清理 `node_modules`):

```bash
rm -rf node_modules
```

再次执行下载,能够发现时间缩短至了 3 秒钟。

```bash
added 138 packages in 3s

33 packages are looking for funding
```

### 7. 验证私有软件发布

为了方便我们进行软件包验证,我们可以将私有仓库设置为默认仓库:

```bash
# 获取默认配置,方便还原
# npm config get registry
https://registry.npmjs.org/
# 设置默认仓库为我们的私有仓库
# npm config set registry http://localhost:4873/
```

然后,使用命令行在我们的私有仓库中注册一个账号:

```bash
# 登录并注册一个账号
# npm adduser --registry http://localhost:4873/ --auth-type=legacy

npm notice Log in on http://localhost:4873/
Username: test
Password: 
Email: (this IS public) 

Logged in on http://localhost:4873/.
```

接着,创建一个私有的 NPM 软件包,package.json 内容可以这样写:

```bash
{
  "name": "@your-company/package-name",
  "version": "1.0.0",
  "private": false
}
```

最后,使用 `npm publish` 命令进行发布:

```bash
# npm publish

npm notice
npm notice 📦  @your-company/package-name@1.0.0
npm notice Tarball Contents
npm notice 85B package.json
npm notice Tarball Details
npm notice name: @your-company/package-name
npm notice version: 1.0.0
npm notice filename: your-company-package-name-1.0.0.tgz
npm notice package size: 166 B
npm notice unpacked size: 85 B
npm notice shasum: e07da1eb9bffbac04aa4400490c532935a3d2c1d
npm notice integrity: sha512-TykUhzEiDswXM[...]cUQeE1KFyXHZQ==
npm notice total files: 1
npm notice
npm notice Publishing to http://localhost:4873/ with tag latest and default access
+ @your-company/package-name@1.0.0
```

私有化的软件包就发布完毕了。

再次访问浏览器控制台,能够看到我们发布的软件包。

![刚刚发布成功的软件包](https://attachment.soulteary.com/2024/12/01/npm-publish.jpg)

## 实践部署:面向生产 CI/CD 环境(Docker)

有了上面的经验后,我们可以很轻松的编写适合生产环境使用的,使用 Docker 提供服务的配置。

首先,使用 Docker 下载软件:

```bash
docker pull verdaccio/verdaccio:6.0.2
```

配置我们使用和上面相同的内容,并将文件保存为 `config.yaml`,稍后使用。

```bash
touch htpasswd
```

使用命令行创建一个空白文件,如果后续我们需要为这个 NPM 仓库添加简单的认证,可以修改这个文件。

在上一篇文章《[折腾基本功:Redis 从入门到 Docker 部署](https://soulteary.com/2024/11/30/basic-skills-redis-from-getting-started-to-docker-deployment.html)》中,我们聊过了如何从零到一完善配置到中等规模生产环境可用。参考上篇文章和上面的内容,我们可以简单得到下面的配置:

```yaml
name: npm-registry

services:
  verdaccio:
    image: verdaccio/verdaccio:6.0.2
    command: verdaccio -c /etc/verdaccio.yaml
    restart: always
    ports:
      - 4873:4873
    environment:
      - TZ=Asia/Shanghai
    volumes:
      - /etc/localtime:/etc/localtime:ro
      - ./config.yaml:/etc/verdaccio.yaml:ro
      - ./storage:/opt/verdaccio/storage:rw
      - ./plugins:/opt/verdaccio/plugins:rw
      - ./htpasswd:/opt/verdaccio/htpasswd:rw
    healthcheck:
      test: ["CMD", "wget", "--no-verbose", "--tries=1", "--spider", "http://localhost:4873/-/ping"]
      interval: 1s
      timeout: 3s
      retries: 5
    logging:
        driver: "json-file"
        options:
            max-size: "10m"
```

然后使用命令启动服务:

```bash
docker compose up -d
```

服务启动后,使用 `docker compose ps`  观察状况,不出意外将看到  `(healthy)` 的标志,就可以放心使用啦:

```yaml
docker compose ps
NAME                       IMAGE                       COMMAND                  SERVICE     CREATED         STATUS                   PORTS
npm-registry-verdaccio-1   verdaccio/verdaccio:6.0.2   "uid_entrypoint verd…"   verdaccio   5 minutes ago   Up 5 minutes (healthy)   0.0.0.0:4873->4873/tcp, :::4873->4873/tcp
```

当服务出现任何异常的时候,它会自动尝试重启进程修复,并在服务就绪的情况下重新开启端口,提供服务。

## 最佳实践建议

好了,看到这里,基本一个满足中小团队的私有化方案就搞定了。

在进行系统部署时,高可用性是一个重要的考虑因素。如果你使用云端环境,可以考虑将 Compose 配置转换为 Kubernetes 集群进行部署,使用多机来保障不停机服务。

为了确保数据安全,可以建立定期备份对存储数据进行保护,比如使用定时任务工具和 Rsync 来进行经济实惠的数据备份,可以参考《[使用 Docker 和 Traefik 搭建轻量美观的计划任务工具](https://soulteary.com/2022/11/17/use-docker-and-traefik-to-build-a-lightweight-and-beautiful-scheduled-task-tool.html)》,或者直接使用云端的磁盘快照功能。

或者在存储方案的选择上,也可以进行一些“偷懒”,小型团队存储 500G ~ 1T 左右数据的时候,使用本地存储加备份即可。大型团队或频繁构建的情况下,可以考虑使用云服务的对象存储(S3)来替换本地存储,通常这类服务的可靠性都在六个九以上。

安全性配置也是系统部署中不可忽视的环节。本文中配置的是 HTTP 协议,放开用户的下载和发布软件包权限,在实际生产环境,我们需要配置严格的 Token 访问,用户权限。在传输时,可以将软件挂载网关上。一来可以将 HTTP 无感知转换为 HTTPS,另外可以轻松添加认证,而这一切都无需折腾网关后的软件,利于集中管理。

最后,关于缓存策略,需要结合实际业务场景合理设置缓存时间,并建立定期清理过期缓存的机制。同时,要对存储空间的使用情况进行监控,及时发现和处理潜在的存储问题,确保系统的稳定运行。

## 常见问题解决

**在开发过程中,包发布失败是一个常见的问题。**

遇到这种情况时,首先需要检查用户是否具有足够的发布权限,然后确认包的名称是否符合命名规范。同时,还要验证发布的版本号是否与已有版本重复,因为重复的版本号会导致发布失败。(默认情况下不允许覆盖发布)

**当遇到包下载速度慢的问题时,需要从多个方面进行优化。**

首先要检查上游仓库的配置是否正确,确保连接稳定。其次,可以通过优化缓存策略来提升下载效率。对于国内用户,建议考虑使用国内镜像源来加快下载速度。

**存储空间不足是另一个需要重点关注的问题。**

为了解决这个问题,我们可以定期清理那些长期未被使用的包文件。同时,建议配置自动清理策略,对过期或不常用的包进行自动清理。如果清理后仍然无法满足需求,则需要考虑扩展存储空间来确保系统的正常运行。

## 最后

希望这篇文章能够帮助你搭建起可靠的私有 NPM 仓库,如果有任何问题,欢迎讨论。

—EOF