这是我们玩客云稳定性优化指南的第二部分。
不管你是想要一台经济实惠的服务器,还是对嵌入式设备感兴趣,这一系列文章都会手把手教你如何让玩客云运行得更稳定、更容易维护,同时避开那些常见的坑。
写在前面
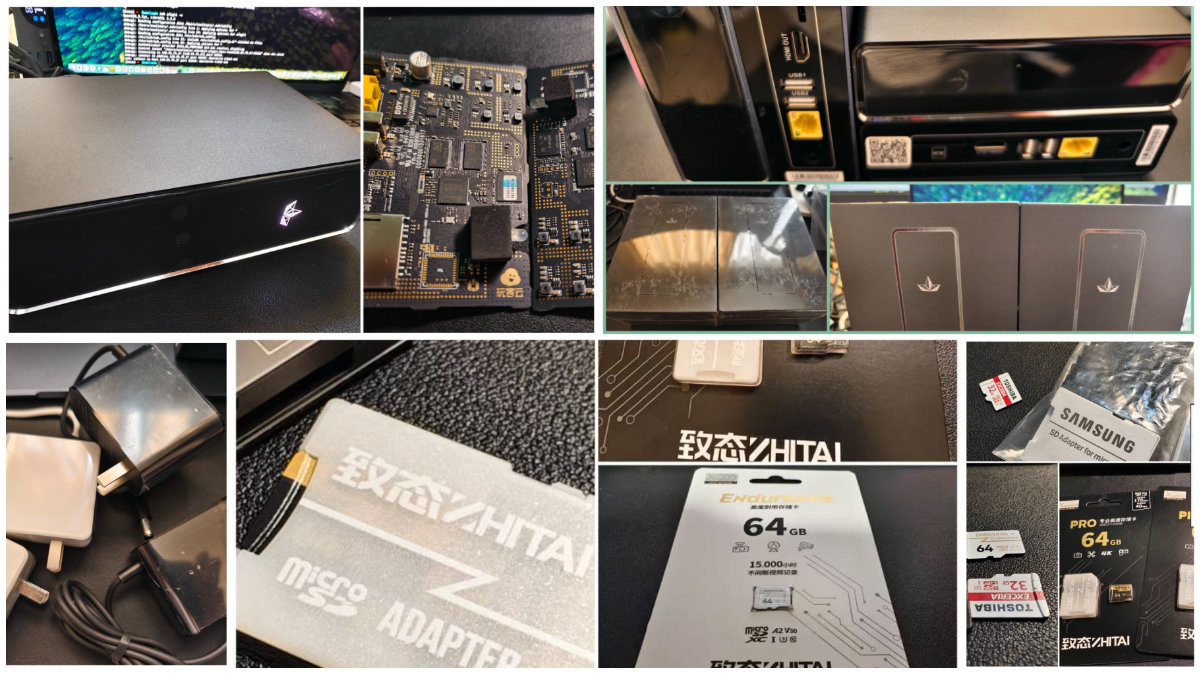
在上一篇文章《五十元内的轻量服务器:玩客云折腾速通指南(一)》中,我们已经搞定了可靠的玩客云的引导程序。我们让玩客云能够脱离不够可靠的内置 eMMC 存储介质运行,转而使用更可靠、更容易替换的 SD 卡或 U 盘来运行系统。

这一篇文章中,我们要完成系统镜像的构建、刷写、基础配置,以及 Docker 的安装。最后,我们还会运行一个简单好用的 Docker 应用作为演示。
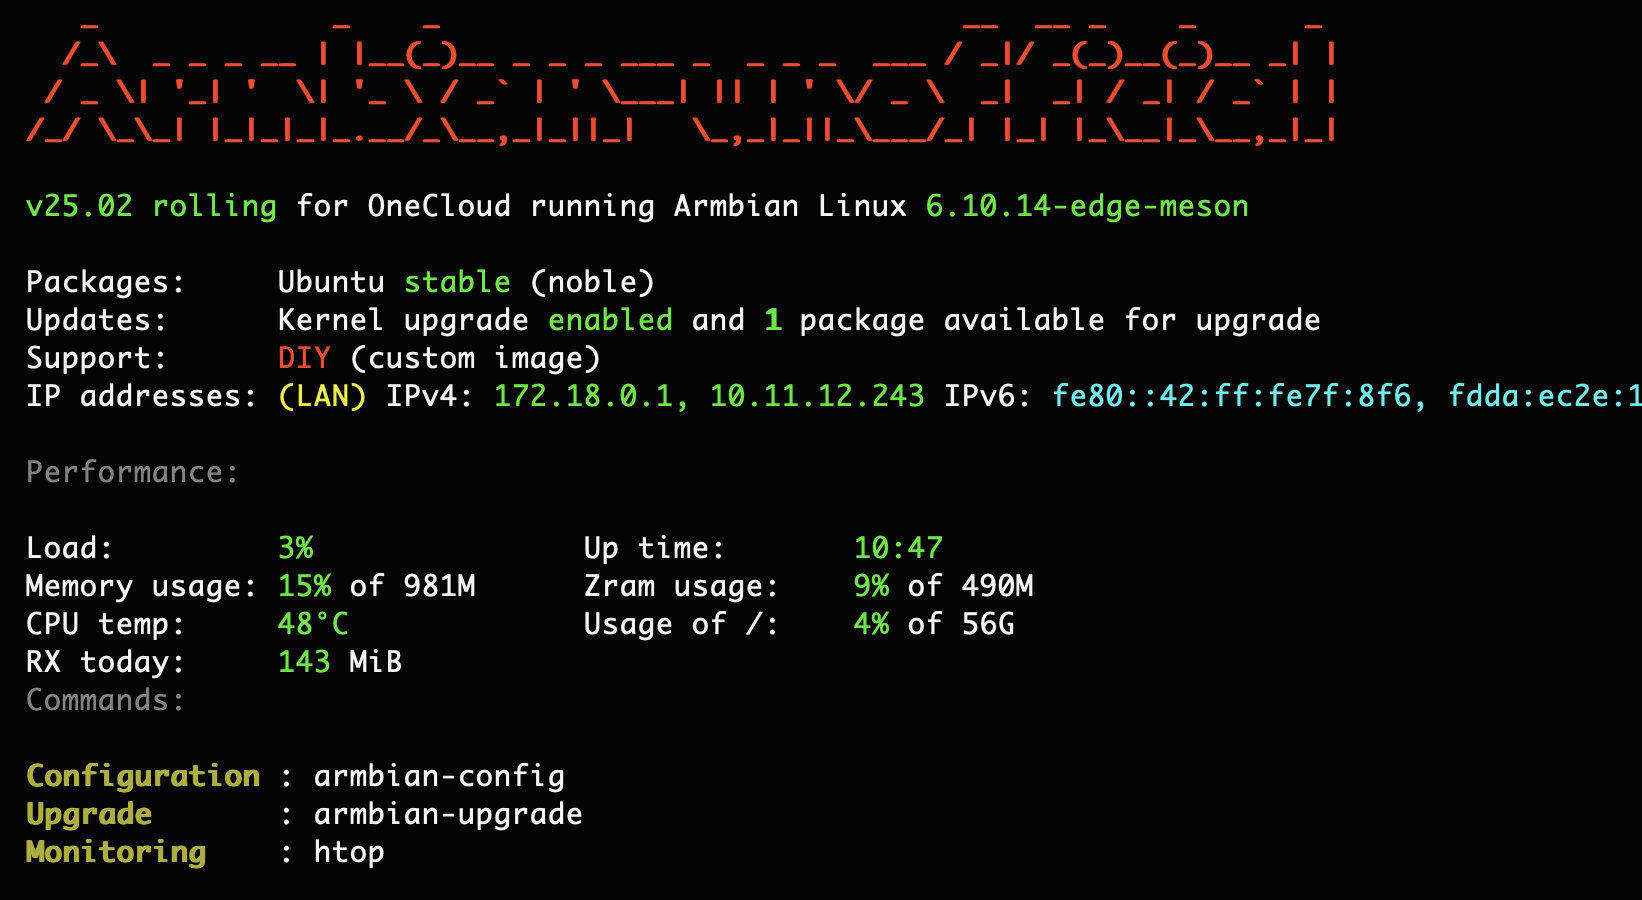
已经构建好的引导程序(u-boot)和系统镜像(基于 Ubuntu 24.04 和 Linux Kernel 6.10)的原始代码仓库,开源在了这两个仓库:soulteary/onecloud-u-boot、soulteary/armbian-build-s805,欢迎一键三连。
这部分内容会比上一篇的软件部分稍微复杂一些,但别担心,只要按照我的步骤来,你一定能成功构建出自己的系统镜像。虽然前路漫长,但你始终在最优路径上。 放心,一定会比几年前的这篇内容更简单:《玩客云折腾记录(一):编译 ArmBian 系统》。
说它复杂,主要是因为这几点:
- Armbian 支持众多硬件,而且相关代码和依赖程序都一直在更新。对新手来说,无论是代码下载还是相关模块的自动配置,整个仓库的构建过程都像个黑盒子。
- 虽然玩客云已经被 Armbian 官方支持,但还有一些实用的补丁没有被合并进去。我们需要手动添加这些补丁。另外,玩客云在不同 Linux 内核版本下的完善程度也不太一样。
- Armbian 的构建系统经过多次改进,现在已经很好用了。但如果配置不当,就可能得不到想要的结果。
- 下载依赖需要很好的网络环境,否则可能会很慢,甚至下载不完整或悄悄出错,导致各种奇怪的问题。
或许有人会认为,官方提供的界面式的镜像构建工具已经很好了,简单直观。
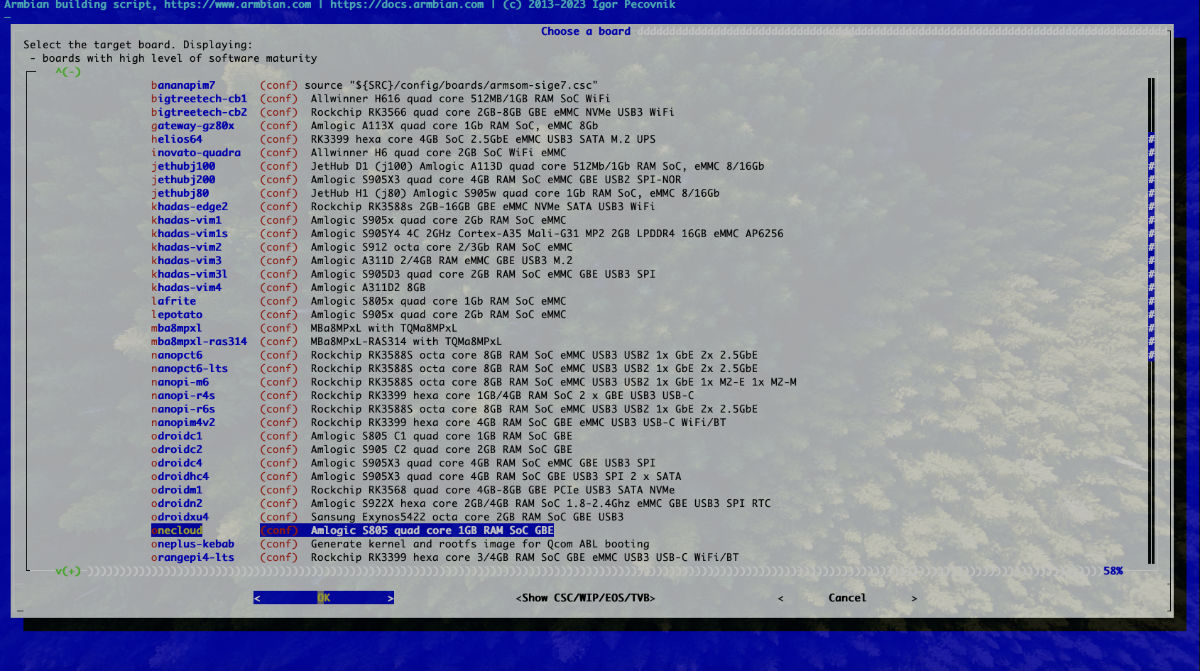
但其实,如果你想通过官方的界面引导式工具完成镜像编译,过程中可能会遇到各种各样奇奇怪怪的“中断和报错”,而无法完成镜像构建。界面操作一旦涉及多个步骤、步骤背后的上下文信息又是黑盒的时候,复杂度和不稳定性都会飙升,它是很难超越命令固定、指令明确的命令行方案的。
了解了这些潜在的问题后,如果第一次没有成功也不要灰心。解决对应的问题,耐心地再试一次就好。毕竟,现在你已经知道可能会遇到哪些“拦路虎”了(就这么多)。
准备工作:获取项目相关代码
我们先创建一个目录,用于接下来的项目代码下载,并进入这个目录:
mkdir armbian-playground
cd armbian-playground
创建一个目录,用来存放项目相关的补丁。(补丁来自 hzyitc ):
mkdir patches
cd patches

# 下载补丁
## 确保引导程序能够正确切换和保存引导哪一个存储设备
curl -LO "https://github.com/armbian/build/pull/4077.patch"
## 避免系统升级内核的时候出现删除整个 /boot 目录中的内容
curl -LO "https://github.com/armbian/build/pull/5076.patch"

# 返回 armbian-playground 目录
cd ..
下载项目代码:
git clone --depth=1 https://github.com/soulteary/armbian-build-s805.git build
应用补丁到源代码:
patch --batch -p1 -N < ../patches/5076.patch
patch --batch -p1 -N < ../patches/4077.patch
打好了补丁之后,我们就可以进行 Linux 内核和操作系统镜像的构建啦。构建完整镜像构建需要 20~30GB 左右的磁盘空间,比以往的系统构建要小不少。
实战 Armbian 系统编译
我们真正的实战从 Linux 内核的编译开始。
构建 Armbian 使用的 Linux 新内核

对比 Linux 内核的新老版本,差异其实非常明显。不论是从在系统整体性能、文件系统的稳定性和可靠性、硬件驱动的支持范围、还是各类软件的生态适配程度上,新版本通常都是好过老版本的。
在 Armbian 项目的 armbian/build/patch/kernel/archive 中,目录下,我们可以清楚地看到项目对不同硬件的内核支持情况。
对于我们使用的硬件(在项目中最初的兼容硬件代号被称作“meson ”),目前有四个版本可选:
- meson-s4t7-5.15
- meson-6.1
- meson-6.6(当前稳定版,即
current) - meson-6.10(最新版本,即
edge,补丁最全)
综合考虑,这里我们选择功能最完善的 6.10 版本来构建。只需要执行以下命令:
./compile.sh kernel BOARD=onecloud BRANCH=edge EXPERT=yes USE_CCACHE=no KERNEL_MAJOR_MINOR=6.10
如果你的网络环境良好,整个构建过程大约只需要 3 分钟。
[🌿] Applying cmdline param [ 'USE_CCACHE': '(unset)' --> 'no' early ]
[🌿] Applying cmdline param [ 'KERNEL_MAJOR_MINOR': '(unset)' --> '6.10' early ]
[🌿] Applying cmdline param [ 'EXPERT': '(unset)' --> 'yes' early ]
[🌿] Applying cmdline param [ 'BRANCH': '(unset)' --> 'edge' early ]
[🌿] Applying cmdline param [ 'BOARD': '(unset)' --> 'onecloud' early ]
[🌱] artifact [ kernel :: kernel() ]
[🌱] Using prebuilt Armbian image as base for 'ubuntu-jammy' [ DOCKER_ARMBIAN_BASE_IMAGE: ghcr.io/armbian/docker-armbian-build:armbian-ubuntu-jammy-latest ]
[🌿] Docker info [ Docker 27.3.1 Kernel:6.8.0-51-generic RAM:62.49GiB CPUs:32 OS:'Ubuntu 24.04.1 LTS' hostname 'LEGION-REN9000K-34IRZ soulteary' under 'Linux' - buildx:yes - loop-hacks:yes static-loops:no ]
[🌱] Creating [ .dockerignore ]
[🌱] Docker launcher [ enabling all extensions looking for Docker dependencies ]
[🌱] Extension manager [ processed 32 Extension Methods calls and 129 Extension Method implementations ]
[🌱] Extension: fs-cryptroot-support: Adding packages to host dependencies [ cryptsetup openssh-client ]
[🌱] Preparing rkdevflash host-side dependencies [ rkdevflash ]
[🌱] Creating [ Dockerfile; FROM ghcr.io/armbian/docker-armbian-build:armbian-ubuntu-jammy-latest ]
[🌱] Armbian docker image [ already exists: ghcr.io/armbian/docker-armbian-build:armbian-ubuntu-jammy-latest ]
[🌱] Building [ Dockerfile via 'buildx build --progress=plain --load' ]
[🔨]   #0 building with "default" instance using docker driver
[🔨]
[🔨]   #1 [internal] load build definition from Dockerfile
[🔨]   #1 transferring dockerfile: 2.15kB done
[🔨]   #1 DONE 0.0s
[🔨]
[🔨]   #2 [internal] load metadata for ghcr.io/armbian/docker-armbian-build:armbian-ubuntu-jammy-latest
[🔨]   #2 DONE 0.0s
[🔨]
[🔨]   #3 [internal] load .dockerignore
[🔨]   #3 transferring context: 441B done
[🔨]   #3 DONE 0.0s
[🔨]
[🔨]   #4 [1/6] FROM ghcr.io/armbian/docker-armbian-build:armbian-ubuntu-jammy-latest
[🔨]   #4 DONE 0.0s
[🔨]
[🔨]   #5 [internal] load build context
[🔨]   #5 transferring context: 21.71kB 0.0s done
[🔨]   #5 DONE 0.0s
[🔨]
[🔨]   #6 [4/6] RUN locale-gen
[🔨]   #6 CACHED
[🔨]
[🔨]   #7 [2/6] RUN echo "--> CACHE MISS IN DOCKERFILE: apt packages." &&  DEBIAN_FRONTEND=noninteractive apt-get -y update &&  DEBIAN_FRONTEND=noninteractive apt-get install -y --no-install-recommends bash git psmisc uuid-runtime bc binfmt-support bison libc6-dev make dpkg-dev gcc ca-certificates ccache cpio device-tree-compiler dialog dirmngr dosfstools dwarves flex gawk gnupg gpg imagemagick jq kmod libbison-dev libelf-dev libfdt-dev libfile-fcntllock-perl libmpc-dev libfl-dev lz4 libncurses-dev libssl-dev libusb-1.0-0-dev linux-base locales lsof ncurses-base ncurses-term ntpdate patchutils pkg-config pv qemu-user-static arch-test rsync swig u-boot-tools udev uuid-dev zlib1g-dev file tree expect colorized-logs unzip zip pigz xz-utils pbzip2 lzop zstd parted gdisk fdisk aria2 curl wget axel parallel rdfind python3-dev python3-pip libffi-dev libgnutls28-dev python3-distutils python2 python2-dev gcc-x86-64-linux-gnu gcc-aarch64-linux-gnu gcc-arm-linux-gnueabihf gcc-arm-linux-gnueabi gcc-riscv64-linux-gnu debian-archive-keyring libc6-amd64-cross mkbootimg g++-aarch64-linux-gnu g++ btrfs-progs cryptsetup openssh-client f2fs-tools nilfs-tools xfsprogs zerofree lvm2 qemu-utils qemu-utils libudev-dev libusb-1.0-0-dev dh-autoreconf build-essential gcc-arm-linux-gnueabi gcc-or1k-elf qemu-utils qemu-utils
[🔨]   #7 CACHED
[🔨]
[🔨]   #8 [3/6] RUN sed -i 's/# en_US.UTF-8/en_US.UTF-8/' /etc/locale.gen
[🔨]   #8 CACHED
[🔨]
[🔨]   #9 [5/6] WORKDIR /armbian
[🔨]   #9 CACHED
[🔨]
[🔨]   #10 [6/6] ADD . /armbian/
[🔨]   #10 DONE 0.1s
[🔨]
[🔨]   #11 exporting to image
[🔨]   #11 exporting layers 0.1s done
[🔨]   #11 writing image sha256:4ce675c1cb3160630df86ce7e8ec723dab640388a509c3267f86e55c5d607987 done
[🔨]   #11 naming to armbian.local.only/armbian-build:initial 0.0s done
[🔨]   #11 DONE 0.1s
[🌱] -----------------Relaunching in Docker after 3s------------------ [ here comes the 🐳 ]
[🐳|🌿] Applying cmdline param [ 'PREFER_DOCKER': '(unset)' --> 'no' early ]
[🐳|🌿] Applying cmdline param [ 'USE_CCACHE': '(unset)' --> 'no' early ]
[🐳|🌿] Applying cmdline param [ 'KERNEL_MAJOR_MINOR': '(unset)' --> '6.10' early ]
[🐳|🌿] Applying cmdline param [ 'ARMBIAN_BUILD_UUID': '(unset)' --> '314bad48-c91b-44c4-87f6-a532824bf9c7' early ]
[🐳|🌿] Applying cmdline param [ 'EXPERT': '(unset)' --> 'yes' early ]
[🐳|🌱] Skip     cmdline param [ 'ARMBIAN_RELAUNCHED': already set to 'yes' early ]
[🐳|🌿] Applying cmdline param [ 'BRANCH': '(unset)' --> 'edge' early ]
[🐳|🌿] Applying cmdline param [ 'BOARD': '(unset)' --> 'onecloud' early ]
[🐳|🌿] Applying cmdline param [ 'SKIP_LOG_ARCHIVE': '(unset)' --> 'yes' early ]
[🐳|🌿] Applying cmdline param [ 'SET_OWNER_TO_UID': '(unset)' --> '1000' early ]
[🐳|🌱] artifact [ kernel :: kernel() ]
[🐳|✅] change-tracking: in cli_artifact_run before artifact_cli_adapter_config_prep [ KERNEL_MAJOR_MINOR='6.10' ]
[🐳|🌱] Starting single build process [ onecloud ]
[🐳|🌱] Checking [ basic host setup ]
[🐳|🌱] Build host OS release [ jammy ]
[🐳|🌱] Build host architecture [ amd64 ]
[🐳|🌱] Sourcing board configuration [ /armbian/config/boards/onecloud.conf ]
[🐳|✅] change-tracking: after sourcing board file config/boards/onecloud.conf [ BOARDFAMILY='meson8b' ]
[🐳|✅] change-tracking: after sourcing board file config/boards/onecloud.conf [ BOOTCONFIG='none' ]
[🐳|✅] change-tracking: after defaulting LINUXFAMILY to BOARDFAMILY [ LINUXFAMILY='meson8b' ]
[🐳|🌱] Starting main configuration
[🐳|🌱] Using REVISION from [ main VERSION file: '25.02.0-trunk' ]
[🐳|🌱] Sourcing family configuration [ /armbian/config/sources/families/meson8b.conf ]
[🐳|✅] change-tracking: after sourcing family config [ LINUXFAMILY='meson'  # (was: 'meson8b') ]
[🐳|✅] change-tracking: after sourcing family config [ NETWORKING_STACK='network-manager' ]
[🐳|🌱] Sourcing arch configuration [ armhf.conf ]
[🐳|🌱] Using NETWORKING_STACK [ NETWORKING_STACK: network-manager ]
[🐳|🌱] Adding networking extensions [ net-network-manager, net-chrony ]
[🐳|🌿] Enabling extension [ net-network-manager ]
[🐳|🌿] Enabling extension [ net-chrony ]
[🐳|🌱] Extension manager [ processed 8 Extension Methods calls and 14 Extension Method implementations ]
[🐳|✅] change-tracking: after user_config hooks [ BOOTPATCHDIR='u-boot-meson' ]
[🐳|🌱] Extension: net-chrony: Adding extra package to image [ chrony ]
[🐳|🌱] Extension: net-network-manager: Adding extra packages to image [ network-manager network-manager-openvpn netplan.io ]
[🐳|🌱] KERNELPATCHDIR is unset; using 'archive/meson-6.10' [ common_defaults_for_mainline ]
[🐳|🌱] mainline-kernel: default to branch / rolling stable version [ Using KERNELBRANCH='branch:linux-6.10.y' for KERNEL_MAJOR_MINOR='6.10' ]
[🐳|✅] change-tracking: after late_family_config hooks [ KERNELSOURCE='https://git.kernel.org/pub/scm/linux/kernel/git/stable/linux.git' ]
[🐳|✅] change-tracking: after late_family_config hooks [ KERNELBRANCH='branch:linux-6.10.y' ]
[🐳|✅] change-tracking: after late_family_config hooks [ LINUXCONFIG='linux-meson-edge' ]
[🐳|✅] change-tracking: after late_family_config hooks [ KERNELPATCHDIR='archive/meson-6.10' ]
[🐳|✅] change-tracking: after late_family_config hooks [ KERNEL_PATCH_ARCHIVE_BASE='meson' ]
[🐳|✅] change-tracking: after late_family_config hooks [ BOOTSOURCE='https://github.com/u-boot/u-boot' ]
[🐳|✅] change-tracking: after late_family_config hooks [ BOOTBRANCH='tag:v2022.07' ]
[🐳|✅] change-tracking: after late_family_config hooks [ BOOTDIR='u-boot' ]
[🐳|✅] change-tracking: before handling KERNEL_MAJOR_MINOR in config_post_main [ BOOTSOURCEDIR='u-boot-worktree/u-boot/v2022.07' ]
[🐳|🚸] Not-installing software-properties-common [ For distro 'Debian' release '' ]
[🐳|✅] change-tracking: before calling extension_finish_config [ LINUXSOURCEDIR='linux-kernel-worktree/6.10__meson__armhf' ]
[🐳|🌱] Minimal configuration prepared for build [ prep_conf_main_minimal_ni ]
[🐳|✨] Repeat Build Options (early) [ ./compile.sh kernel BOARD=onecloud BRANCH=edge EXPERT=yes KERNEL_MAJOR_MINOR=6.10 USE_CCACHE=no ]
[🐳|🌱] Checked directory OK for mount options [ /armbian/.tmp ('main temporary dir') ]
[🐳|🌱] Preparing [ host ]
[🐳|🌱] Running in container [ Adding provisions for container building ]
[🐳|🌱] Ignoring toolchains [ SKIP_EXTERNAL_TOOLCHAINS: yes ]
[🐳|🌱] Using cached [ GIT_INFO_KERNEL ]
[🐳|🌱] User patches directory for kernel [ /armbian/userpatches/kernel/archive/meson-6.10 ]
[🐳|🌱] Using kernel config file [ config/kernel/linux-meson-edge.config ]
[🐳|🌱] Enabling eBPF and BTF info [ for fully BTF & CO-RE enabled kernel ]
[🐳|🌱] Getting ORAS manifest [ ORAS manifest from ghcr.io/armbian/os/kernel-meson-edge:6.10.14-S47c2-D6d0e-P2985-C8f1eH1023-HK01ba-Va132-B3417-R448a ]
[🐳|🌱] Artifact is available in remote cache [ ghcr.io/armbian/os/kernel-meson-edge:6.10.14-S47c2-D6d0e-P2985-C8f1eH1023-HK01ba-Va132-B3417-R448a - 'kernel-meson-edge - 6.10.14-S47c2-D6d0e-P2985-C8f1eH1023-HK01ba-Va132-B3417-R448a - version "6.10.14" git revision "47c2f92131c47a37ea0e3d8e1a4e4c82a9b473d4" codename "Baby Opossum Posse" drivers hash "6d0ed4a1_2af55cb0" patches hash "2985927d7fb3892e" .config hash "8f1e0e88eef80d03" .config hook hash "1023652ce41815b6" variables hash "a13228369c8c392d623aef1f32ad559f84572c8c9c2b16fd218b094b9421c846" framework bash hash "341702db5f597da2" - type: deb-tar' ]
[🐳|🌱] Obtaining artifact from remote cache [ ghcr.io/armbian/os/kernel-meson-edge:6.10.14-S47c2-D6d0e-P2985-C8f1eH1023-HK01ba-Va132-B3417-R448a into kernel-meson-edge_6.10.14-S47c2-D6d0e-P2985-C8f1eH1023-HK01ba-Va132-B3417-R448a_armhf.tar ]
✓ Pulled      kernel-meson-edge_6.10.14-S47c2-D6d0e-P2985-C8f1eH1023-HK01ba-Va132-B3417-R448a_armhf.tar                                                          43.8/43.8 MB 100.00%  2m47s
  └─ sha256:50263c45ce665bf682fd9825d53f1adf6f47ba7374aa4de961da4a45a47d960e
✓ Pulled      application/vnd.oci.image.manifest.v1+json                                                                                                         1.16/1.16 kB 100.00%     0s
  └─ sha256:d399e089b07a48f019621aedb13eb709d2372978764ab9f5db4510d51d00bd8c
[🐳|🔨]   Pulled [registry] ghcr.io/armbian/os/kernel-meson-edge:6.10.14-S47c2-D6d0e-P2985-C8f1eH1023-HK01ba-Va132-B3417-R448a
[🐳|🔨]   Digest: sha256:d399e089b07a48f019621aedb13eb709d2372978764ab9f5db4510d51d00bd8c
[🐳|🌱] Unpacking artifact [ deb-tar: kernel-meson-edge_6.10.14-S47c2-D6d0e-P2985-C8f1eH1023-HK01ba-Va132-B3417-R448a_armhf.tar ]
[🐳|🔨]   global/linux-image-edge-meson_6.10.14-S47c2-D6d0e-P2985-C8f1eH1023-HK01ba-Va132-B3417-R448a_armhf.deb
[🐳|🔨]   global/linux-headers-edge-meson_6.10.14-S47c2-D6d0e-P2985-C8f1eH1023-HK01ba-Va132-B3417-R448a_armhf.deb
[🐳|🔨]   global/linux-libc-dev-edge-meson_6.10.14-S47c2-D6d0e-P2985-C8f1eH1023-HK01ba-Va132-B3417-R448a_armhf.deb
[🐳|🔨]   global/linux-dtb-edge-meson_6.10.14-S47c2-D6d0e-P2985-C8f1eH1023-HK01ba-Va132-B3417-R448a_armhf.deb
[🐳|🔨]   removed '/armbian/output/packages-hashed/kernel-meson-edge_6.10.14-S47c2-D6d0e-P2985-C8f1eH1023-HK01ba-Va132-B3417-R448a_armhf.tar'
[🐳|💖] artifact [ obtained from remote cache: kernel-meson-edge 6.10.14-S47c2-D6d0e-P2985-C8f1eH1023-HK01ba-Va132-B3417-R448a ]
[🐳|🌱] Reversioning package [ re-version 'kernel-meson-edge(deb-tar)::6.10.14-S47c2-D6d0e-P2985-C8f1eH1023-HK01ba-Va132-B3417-R448a' to '25.02.0-trunk' ]
[🐳|🔨]   removed '/armbian/output/packages-hashed/global/linux-image-edge-meson_6.10.14-S47c2-D6d0e-P2985-C8f1eH1023-HK01ba-Va132-B3417-R448a_armhf.deb'
[🐳|🔨]   removed '/armbian/output/packages-hashed/global/linux-headers-edge-meson_6.10.14-S47c2-D6d0e-P2985-C8f1eH1023-HK01ba-Va132-B3417-R448a_armhf.deb'
[🐳|🔨]   removed '/armbian/output/packages-hashed/global/linux-libc-dev-edge-meson_6.10.14-S47c2-D6d0e-P2985-C8f1eH1023-HK01ba-Va132-B3417-R448a_armhf.deb'
[🐳|🔨]   removed '/armbian/output/packages-hashed/global/linux-dtb-edge-meson_6.10.14-S47c2-D6d0e-P2985-C8f1eH1023-HK01ba-Va132-B3417-R448a_armhf.deb'
[🐳|🌱] Runtime [ 2:52 min ]
[🐳|✨] Repeat Build Options [ ./compile.sh kernel BOARD=onecloud BRANCH=edge EXPERT=yes KERNEL_MAJOR_MINOR=6.10 USE_CCACHE=no ]
[🐳|🌱] Cleaning up [ please wait for cleanups to finish ]
[🐳|🌿] ANSI log file built; inspect it by running: [ less -RS output/logs/log-kernel-314bad48-c91b-44c4-87f6-a532824bf9c7.log.ans ]
[🐳|🌿] Share log manually (or SHARE_LOG=yes): [ curl --data-binary @output/logs/log-kernel-314bad48-c91b-44c4-87f6-a532824bf9c7.log.ans https://paste.armbian.com/log ]
[🌱] -------------Docker run finished after 176s------------------------ [ 🐳 successfull ]
[🌱] Cleaning up [ please wait for cleanups to finish ]
构建完成后,在 output/debs 目录下会生成这些内核相关的安装包:
# ls output/debs

linux-dtb-edge-meson_25.02.0-trunk_armhf__6.10.14-S47c2-D6d0e-P2985-C8f1eH1023-HK01ba-Va132-Bbe91-R448a.deb
linux-headers-edge-meson_25.02.0-trunk_armhf__6.10.14-S47c2-D6d0e-P2985-C8f1eH1023-HK01ba-Va132-Bbe91-R448a.deb
linux-image-edge-meson_25.02.0-trunk_armhf__6.10.14-S47c2-D6d0e-P2985-C8f1eH1023-HK01ba-Va132-Bbe91-R448a.deb
linux-libc-dev-edge-meson_25.02.0-trunk_armhf__6.10.14-S47c2-D6d0e-P2985-C8f1eH1023-HK01ba-Va132-Bbe91-R448a.deb
这些文件我们暂时不用管,在后续构建完整系统时会用到它们。
构建基于 Ubuntu 24.04 的 Armbian 系统
接下来,我们开始构建操作系统。我们选择目前最受欢迎的发行版 Ubuntu 作为 Armbian 的底层系统。

Ubuntu 作为目前最流行的 Linux 发行版之一,有着丰富的软件生态系统。选择它作为 Armbian 的基础系统,意味着我们可以直接使用大量现成的软件包,而不必从源码开始重新编译,这样能节省我们大量宝贵的开发时间。
在启动编译过程时,为了加快构建速度,我特意在参数中配置了国内的软件源镜像。这样可以显著提升依赖包的下载速度,让整个构建过程更加顺畅。
接下来,让我们开始动手构建吧!
./compile.sh build BOARD=onecloud BRANCH=edge RELEASE=noble KERNEL_CONFIGURE=no BUILD_MINIMAL=no BUILD_DESKTOP=no EXPERT=yes SKIP_EXTERNAL_TOOLCHAINS=yes CLEAN_LEVEL= USE_CCACHE=no COMPRESS_OUTPUTIMAGE=img MANAGE_ACNG=no UBUNTU_MIRROR=mirrors.tuna.tsinghua.edu.cn/armbian DOWNLOAD_MIRROR=china
编译过程会下载大量依赖包和预构建文件,整个构建过程需要一定的时间。你可以通过滚动的日志查看构建进度。
[🌿] Applying cmdline param [ 'USE_CCACHE': '(unset)' --> 'no' early ]
[🌿] Applying cmdline param [ 'BUILD_MINIMAL': '(unset)' --> 'no' early ]
[🌿] Applying cmdline param [ 'COMPRESS_OUTPUTIMAGE': '(unset)' --> 'img' early ]
[🌿] Applying cmdline param [ 'CLEAN_LEVEL': '(unset)' --> '(empty)' early ]
[🌿] Applying cmdline param [ 'BUILD_DESKTOP': '(unset)' --> 'no' early ]
[🌿] Applying cmdline param [ 'SKIP_EXTERNAL_TOOLCHAINS': '(unset)' --> 'yes' early ]
[🌿] Applying cmdline param [ 'EXPERT': '(unset)' --> 'yes' early ]
[🌿] Applying cmdline param [ 'BRANCH': '(unset)' --> 'edge' early ]
[🌿] Applying cmdline param [ 'BOARD': '(unset)' --> 'onecloud' early ]
[🌿] Applying cmdline param [ 'DOWNLOAD_MIRROR': '(unset)' --> 'china' early ]
[🌿] Applying cmdline param [ 'MANAGE_ACNG': '(unset)' --> 'no' early ]
[🌿] Applying cmdline param [ 'RELEASE': '(unset)' --> 'noble' early ]
[🌿] Applying cmdline param [ 'UBUNTU_MIRROR': '(unset)' --> 'mirrors.tuna.tsinghua.edu.cn/armbian' early ]
[🌿] Applying cmdline param [ 'KERNEL_CONFIGURE': '(unset)' --> 'no' early ]
[🌱] Using prebuilt Armbian image as base for 'ubuntu-jammy' [ DOCKER_ARMBIAN_BASE_IMAGE: ghcr.io/armbian/docker-armbian-build:armbian-ubuntu-jammy-latest ]
[🌿] Docker info [ Docker 27.3.1 Kernel:6.8.0-51-generic RAM:62.49GiB CPUs:32 OS:'Ubuntu 24.04.1 LTS' hostname 'LEGION-REN9000K-34IRZ soulteary' under 'Linux' - buildx:yes - loop-hacks:yes static-loops:no ]
[🌱] Creating [ .dockerignore ]
[🌱] Docker launcher [ enabling all extensions looking for Docker dependencies ]
[🌱] Extension manager [ processed 32 Extension Methods calls and 129 Extension Method implementations ]
[🌱] Extension: fs-cryptroot-support: Adding packages to host dependencies [ cryptsetup openssh-client ]
[🌱] Preparing rkdevflash host-side dependencies [ rkdevflash ]
[🌱] Creating [ Dockerfile; FROM ghcr.io/armbian/docker-armbian-build:armbian-ubuntu-jammy-latest ]
[🌱] Armbian docker image [ already exists: ghcr.io/armbian/docker-armbian-build:armbian-ubuntu-jammy-latest ]
[🌱] Building [ Dockerfile via 'buildx build --progress=plain --load' ]
[🔨]   #0 building with "default" instance using docker driver
...
...
构建完毕,将能够看到类似下面的日志输出:
[🐳|🔨]   update-initramfs: Armbian: Converting to u-boot format: /boot/uInitrd-6.10.14-edge-meson
[🐳|🔨]   Image Name:   uInitrd
[🐳|🔨]   Created:      Fri Jan 10 15:35:10 2025
[🐳|🔨]   Image Type:   ARM Linux RAMDisk Image (gzip compressed)
[🐳|🔨]   Data Size:    12041717 Bytes = 11759.49 KiB = 11.48 MiB
[🐳|🔨]   Load Address: 00000000
[🐳|🔨]   Entry Point:  00000000
[🐳|🔨]   update-initramfs: Armbian: Symlinking /boot/uInitrd-6.10.14-edge-meson to /boot/uInitrd
[🐳|🔨]   ln: failed to create symbolic link '/boot/uInitrd': Operation not permitted
[🐳|🔨]   update-initramfs: Symlink failed, copying /boot/uInitrd-6.10.14-edge-meson to /boot/uInitrd
[🐳|🔨]   '/boot/uInitrd-6.10.14-edge-meson' -> '/boot/uInitrd.new'
[🐳|🔨]   renamed '/boot/uInitrd.new' -> '/boot/uInitrd'
[🐳|🔨]   update-initramfs: Armbian: done.
[🐳|🌿] Re-enabling [ initramfs-tools hook for kernel ]
[🐳|🔨]   mode of '/etc/kernel/postinst.d/initramfs-tools' changed from 0644 (rw-r--r--) to 0755 (rwxr-xr-x)
[🐳|🌱] Unmounting [ /armbian/.tmp/mount-94dc1d52-6799-47e8-9800-f800ce52da05 ]
[🐳|🌱] Removing qemu-user-static binary from chroot [ qemu-arm-static during initrd ]
[🐳|🔨]   removed '/armbian/.tmp/mount-94dc1d52-6799-47e8-9800-f800ce52da05/usr/bin/qemu-arm-static'
[🐳|🌱] Free SD cache [ 3% ]
[🐳|🌱] Mount point [ 83% ]
[🐳|🌿] Unmounting recursively [ MOUNT - be patient ]
[🐳|🌿] Freeing loop device [ /dev/loop15 ]
[🐳|🔨]   renamed '/armbian/.tmp/rootfs-94dc1d52-6799-47e8-9800-f800ce52da05.raw' -> '/armbian/.tmp/image-94dc1d52-6799-47e8-9800-f800ce52da05/Armbian-unofficial_25.02.0-trunk_Onecloud_noble_edge_6.10.14.img'
[🐳|🌱] Done building [ Armbian-unofficial_25.02.0-trunk_Onecloud_noble_edge_6.10.14.img ]
[🐳|🌱] Fast-moving file to output/images [ -> Armbian-unofficial_25.02.0-trunk_Onecloud_noble_edge_6.10.14.img (1.97GiB) ]
[🐳|🌱] Fast-moving file to output/images [ -> Armbian-unofficial_25.02.0-trunk_Onecloud_noble_edge_6.10.14.img.txt (19.22KiB) ]
[🐳|🌿] Unmounting recursively [ SDCARD rootfs finished - be patient ]
[🐳|🌿] Done building image [ onecloud ]
[🐳|🌱] Runtime [ 8:47 min ]
[🐳|✨] Repeat Build Options [ ./compile.sh build BOARD=onecloud BRANCH=edge BUILD_DESKTOP=no BUILD_MINIMAL=no COMPRESS_OUTPUTIMAGE=img DOWNLOAD_MIRROR=china EXPERT=yes KERNEL_CONFIGURE=no MANAGE_ACNG=no RELEASE=noble SKIP_EXTERNAL_TOOLCHAINS=yes UBUNTU_MIRROR=mirrors.tuna.tsinghua.edu.cn/armbian USE_CCACHE=no ]
[🐳|🌱] Cleaning up [ please wait for cleanups to finish ]
[🐳|🌿] ANSI log file built; inspect it by running: [ less -RS output/logs/log-build-94dc1d52-6799-47e8-9800-f800ce52da05.log.ans ]
[🐳|🌿] Share log manually (or SHARE_LOG=yes): [ curl --data-binary @output/logs/log-build-94dc1d52-6799-47e8-9800-f800ce52da05.log.ans https://paste.armbian.com/log ]
[🌱] -------------Docker run finished after 532s------------------------ [ 🐳 successfull ]
[🌱] Cleaning up [ please wait for cleanups to finish ]
当构建完成后,在 output/images 目录下就能找到生成的系统镜像文件:
# ls output/images

Armbian-unofficial_25.02.0-trunk_Onecloud_noble_edge_6.10.14.img
Armbian-unofficial_25.02.0-trunk_Onecloud_noble_edge_6.10.14.img.txt
这样我们就得到了一个可用的 Armbian 系统镜像文件,是不是比想象中还简单。这个镜像中默认已经配置好了适用于我们的国内软件加速镜像,可以省下一些折腾的功夫。
本文构建完毕的纯净镜像在 soulteary/armbian-build-s805/releases 的项目发布页面,有需要可以自取。
将 Armbian 镜像刷入“设备”
相信大家还记得上一篇提到的问题:频繁刷写 eMMC 可能导致设备 eMMC 损坏,无法启动,并且总进行设备的拆装也比较麻烦。所以我们通过一次拆机,替换掉了设备的引导程序,让设备能够从 SD 卡或 U 盘启动。
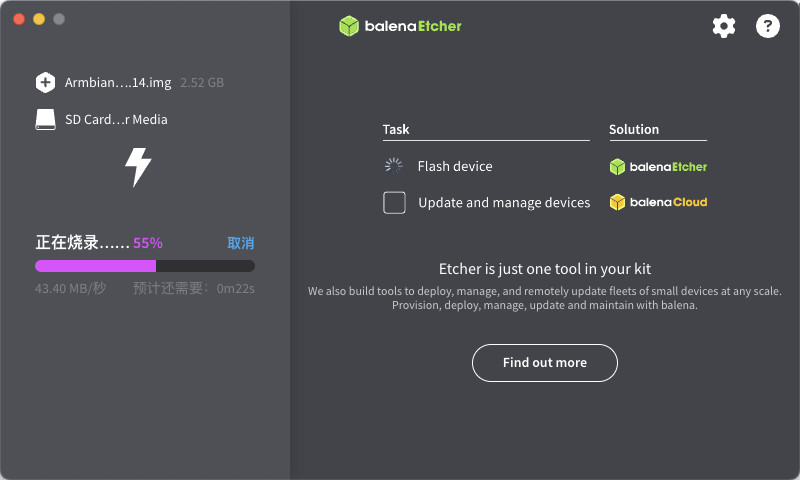
现在只需要用上篇文章介绍的软件将制作好的镜像写入存储介质(SD 卡或 U 盘)即可。我个人选择了 SD 卡作为启动盘,原因在上篇也说过了。
烧录完成后,我们只需要:将 SD 卡插入设备、连接网线和电源、等待设备自动启动。
到这里,设备的系统刷机就完成了。以后如果想换系统,直接把新镜像刷到这张 SD 卡上,重新插入启动就可以了。
Armbian 系统的初始化配置
设备启动后大约 10~20 秒(引导界面默认等待时间很长),我们就可以通过路由器管理页面或以下命令来查找设备的 IP 地址:
# arp -a | grep onecloud

onecloud.lan (10.11.12.243) at e:b4:xx:xx:xx:xx on en0 ifscope [ethernet]
找到设备 IP 后,使用默认账号 root 和密码 1234 通过 SSH 登录这台等待初始化的设备:
ssh root@10.11.12.243
Armbian 系统提供了一个对新手很友好的初始化向导。首次登录时,它会通过问答形式引导我们完成关键系统配置。
下面是我的初始化过程记录,你可以根据自己的情况来:
Welcome to Armbian-unofficial!

Documentation: https://docs.armbian.com/ | Community support: https://community.armbian.com/

IP address: 10.11.12.243

Create root password: *********
Repeat root password: *********

Support status: community support (edge kernel branch)

Choose default system command shell:

1) bash
2) zsh
1

Shell: BASH

Creating a new user account. Press <Ctrl-C> to abort

Please provide a username (eg. your first name): soulteary
Create user (soulteary) password: *********
Repeat user (soulteary) password: *********

Please provide your real name: soulteary

Dear soulteary, your account soulteary has been created and is sudo enabled.
Please use this account for your daily work from now on.

Detected timezone: Asia/Shanghai

Set user language based on your location? [Y/n] y

At your location, more locales are possible:

1) bo_CN
2) ug_CN
3) ug_CN@latin
4) ug_CN@latin
5) zh_CN.UTF-8
6) Skip generating locales

Please enter your choice:5
完成语言设置后,系统会自动跳转到设备的主界面。在这里,你可以一目了然地看到所有重要信息,包括系统状态、网络连接情况和存储空间使用情况等关键信息。
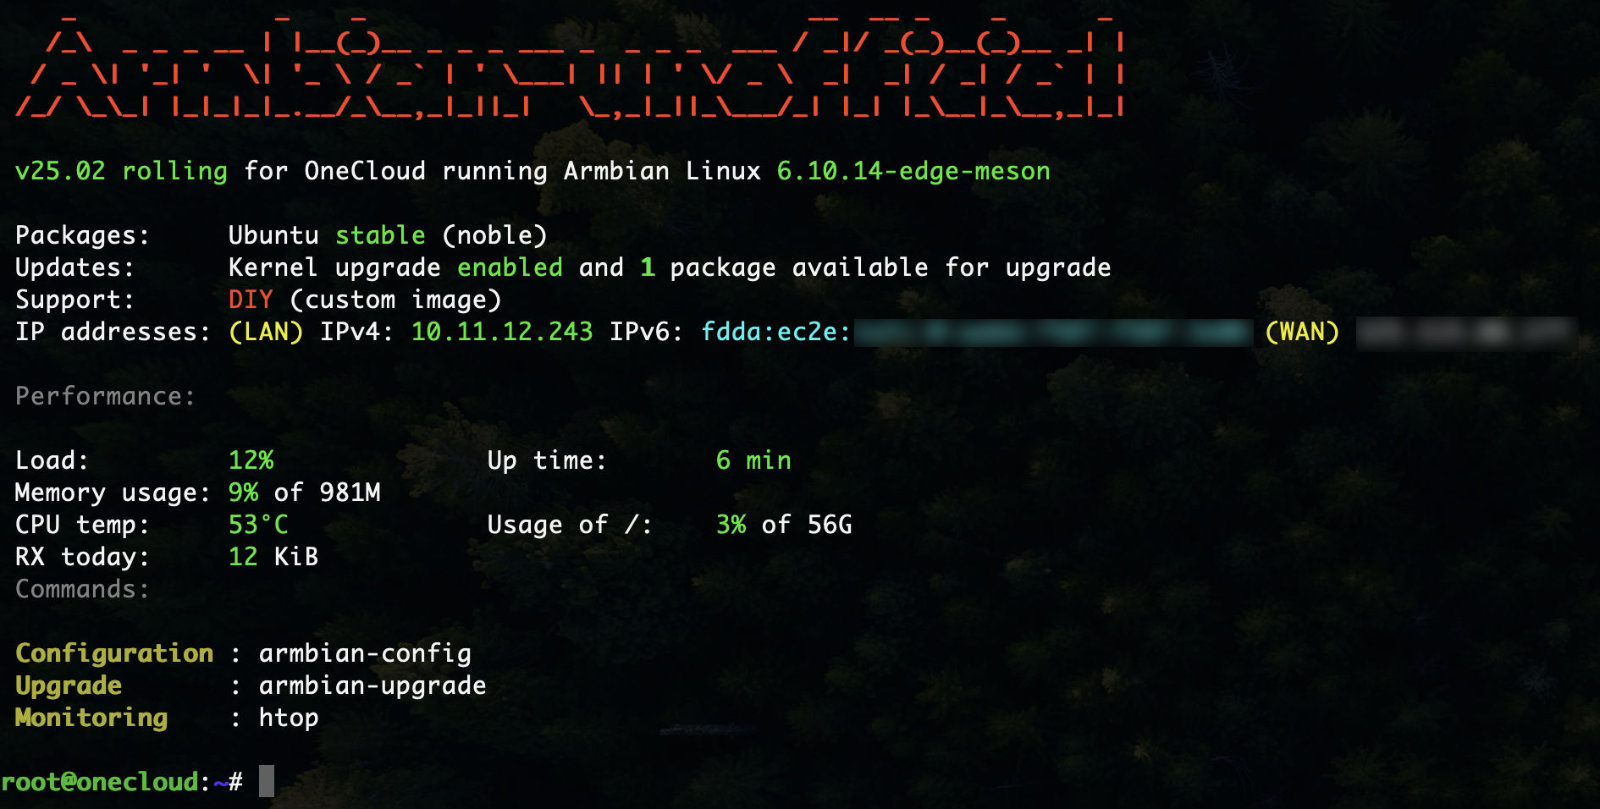
到这一步,如果你只想体验基础功能,其实已经可以开始使用了。不过如果你想获得更流畅的使用体验,更方便地安装和尝试各种软件,建议继续往下看。
先按 CTRL+D 退出当前 SSH 会话,接下来我们将进行系统的基础配置,并安装 Docker 环境。
Armbian 系统基础配置和 Docker 安装
在完成上面的交互式引导后,我创建了一个名为 soulteary 的新用户。下面我们就用这个新用户来进行系统的基础配置。这部分内容和几年前写在《在笔记本上搭建高性价比的 Linux 学习环境:基础篇》文章小节 “进行系统基础配置” 类似,为了 Armbian 做了一些简单的调整。
首先,让我们用新建的用户通过 ssh 命令登录设备:
ssh soulteary@10.11.12.243
如果你不想每次都输入密码,可以在登录前,配置 SSH 密钥来实现免密登录。配置完成后,系统会提示密钥添加成功。
# ssh-copy-id -i ~/.ssh/你的密钥 10.11.12.243

/usr/bin/ssh-copy-id: INFO: Source of key(s) to be installed: "/Users/soulteary/.ssh/你的密钥.pub"
/usr/bin/ssh-copy-id: INFO: attempting to log in with the new key(s), to filter out any that are already installed
/usr/bin/ssh-copy-id: INFO: 1 key(s) remain to be installed -- if you are prompted now it is to install the new keys
soulteary@10.11.12.243's password:

Number of key(s) added:        1

Now try logging into the machine, with:   "ssh '10.11.12.243'"
and check to make sure that only the key(s) you wanted were added.
登录系统后,我们先来解决一个小麻烦:默认情况下,我们执行 sudo 命令时总需要输入密码。只需要执行一条命令,就能让当前用户在使用 sudo 时免除密码验证,大大提升操作效率。
echo "`whoami` ALL=(ALL) NOPASSWD:ALL" | sudo tee "/etc/sudoers.d/dont-prompt-$USER-for-sudo-password"
系统默认名称是 onecloud,为了方便管理,我们可以对它进行重命名,比如改名为 youcloud:
echo "youcloud" | sudo tee /etc/hostname
sudo hostname -F /etc/hostname
当我们重新登录 SSH 时,设备重命名就生效了。
接下来,我们来完成 Docker 的安装。这个过程其实很简单,主要分为三步:
- 安装必要的系统工具
- 配置 Docker 的软件源
- 添加当前用户到 Docker 用户组
sudo apt install -y ca-certificates curl gnupg lsb-release

sudo mkdir -p /etc/apt/keyrings

curl -fsSL -H "user-agent:Mozilla/5.0 (Macintosh; Intel Mac OS X 10_15_7) AppleWebKit/537.36 (KHTML, like Gecko) Chrome/131.0.0.0 Safari/537.36" https://mirrors.tuna.tsinghua.edu.cn/docker-ce/linux/ubuntu/gpg | sudo gpg --dearmor -o /etc/apt/keyrings/docker.gpg

sudo chmod a+r /etc/apt/keyrings/docker.gpg

echo \
  "deb [arch=$(dpkg --print-architecture) signed-by=/etc/apt/keyrings/docker.gpg] https://mirrors.tuna.tsinghua.edu.cn/docker-ce/linux/ubuntu/ \
  $(lsb_release -cs) stable" | sudo tee /etc/apt/sources.list.d/docker.list > /dev/null

sudo gpasswd -a ${USER} docker
对比几年前的情况,现在安装 Docker 简单多了。因为我们选择了 Ubuntu 作为底层系统,几乎所有想要的软件都能通过 apt install 直接安装,不需要再像以前那样还得专门为 Armbian 编译 Docker。
安装完成后,建议先退出当前 SSH 会话(按 CTRL+D),然后重新登录。这样 Docker 的用户组权限就会生效,你可以用 docker info 命令来检查配置是否正确。
docker info
Client: Docker Engine - Community
 Version:    27.4.1
 Context:    default
 Debug Mode: false
 Plugins:
  compose: Docker Compose (Docker Inc.)
    Version:  v2.32.1
    Path:     /usr/libexec/docker/cli-plugins/docker-compose

Server:
 Containers: 0
  Running: 0
  Paused: 0
  Stopped: 0
 Images: 0
 Server Version: 27.4.1
 Storage Driver: overlay2
  Backing Filesystem: extfs
  Supports d_type: true
  Using metacopy: false
  Native Overlay Diff: true
  userxattr: false
 Logging Driver: json-file
 Cgroup Driver: systemd
 Cgroup Version: 2
 Plugins:
  Volume: local
  Network: bridge host ipvlan macvlan null overlay
  Log: awslogs fluentd gcplogs gelf journald json-file local splunk syslog
 Swarm: inactive
 Runtimes: io.containerd.runc.v2 runc
 Default Runtime: runc
 Init Binary: docker-init
 containerd version: 88bf19b2105c8b17560993bee28a01ddc2f97182
 runc version: v1.2.2-0-g7cb3632
 init version: de40ad0
 Security Options:
  seccomp
   Profile: builtin
  cgroupns
 Kernel Version: 6.10.14-edge-meson
 Operating System: Armbian-unofficial 25.02.0-trunk noble
 OSType: linux
 Architecture: armv7l
 CPUs: 4
 Total Memory: 981.3MiB
 Name: onecloud
 ID: 5b67f84b-c044-48f6-b986-c204752b8114
 Docker Root Dir: /var/lib/docker
 Debug Mode: false
 Experimental: false
 Insecure Registries:
  127.0.0.0/8
 Live Restore Enabled: false
进行验证:使用 Docker 运行计划任务工具
我曾在《轻量的定时任务工具 Cronicle:前篇》和《使用 Docker 和 Traefik 搭建轻量美观的计划任务工具》这两篇文章中介绍过一个称手的小工具:Cronicle。
这个工具我已经使用了三、四年了,它自带的简洁 Web 界面让计划任务的管理变得轻松直观。为了让更多人能方便地使用它,我还将它打包成了支持 ARMv7 架构的 Docker 镜像。今年年中总结的时候,发现这个小众的项目一年内在 Docker Hub 上被下载了 5 万多次。如果你感兴趣,可以在 GitHub 上查看完整代码:soulteary/docker-cronicle。
在玩客云上安装 Cronicle 的第一步,就是下载它的 Docker 镜像。我们可以选择从 DockerHub 或者 ghcr.io 来获取镜像,两种方式都可以。不过如果你选择使用 ghcr.io,记得下载完成后需要给镜像重新命名一下。
# 在 DockerHub 下载镜像
docker pull soulteary/cronicle:0.9.63

# 或者,使用 ghcr.io 来完成镜像下载
docker pull ghcr.io/soulteary/cronicle:0.9.63
# 下载之后,对镜像进行重命名
docker tag ghcr.io/soulteary/cronicle:0.9.63 soulteary/cronicle:0.9.63
为了能更好地管理 Cronicle,我们需要创建一个配置文件(docker-compose.yml)。但是在此之前,先要安装一个文本编辑器 Vim,这样我们才能在玩客云上编辑文件。
sudo apt-get install -y vim
安装好 Vim 后,我们就可以创建并编辑 docker-compose.yml 配置文件了。这个文件会包含 Cronicle 运行所需的所有配置信息,包括端口映射、数据存储位置、时区设置等。
vim docker-compose.yml
在交互式界面中复制粘贴下面的配置内容。
name: cronicle
services:

  cronicle:
    image: soulteary/cronicle:0.9.63
    restart: always
    hostname: cronicle
    ports:
      - 3012:3012
    volumes:
      - /etc/localtime:/etc/localtime:ro
      - /etc/timezone:/etc/timezone:ro
      - ./data/data:/opt/cronicle/data
      - ./data/logs:/opt/cronicle/logs
      - ./data/plugins:/opt/cronicle/plugins
    environment:
      - TZ=Asia/Shanghai
    healthcheck:
      test: ["CMD-SHELL", "wget --no-verbose --tries=1 --spider localhost:3012/api/app/ping || exit 1"]
      interval: 5s
      timeout: 1s
      retries: 3
    logging:
        driver: "json-file"
        options:
            max-size: "10m"
完成配置文件的“编写”(粘贴)后,记得按 ESC 键,然后输入 :wq 来保存文件。
最后,我们只需要执行一条简单的命令 docker compose up -d,就能启动 Cronicle 了。
# docker compose up -d
[+] Running 2/2
 ✔ Network cronicle_default       Created                                                                                                                                              0.7s
 ✔ Container cronicle-cronicle-1  Started
当你看到终端显示容器已经成功启动的消息时,就说明安装成功了。
这时候,打开浏览器,输入地址就能看到 Cronicle 的界面了。
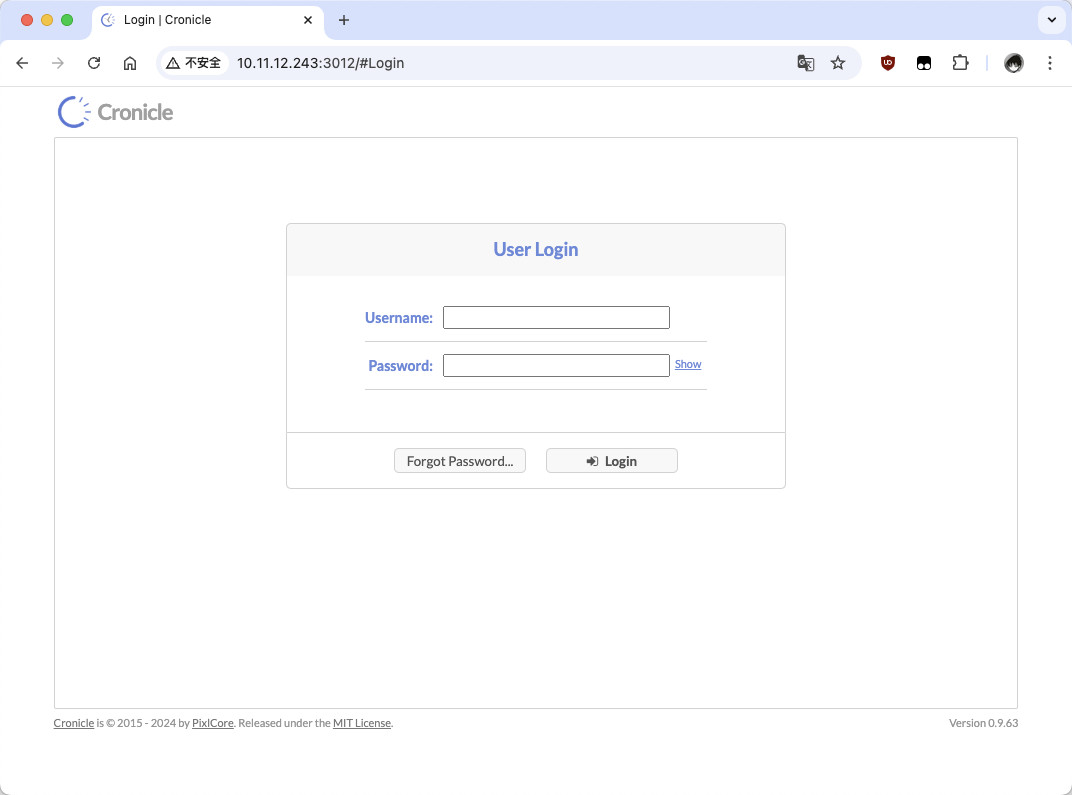
使用默认账号密码 admin 和 admin 登录后,就可以开始使用啦。
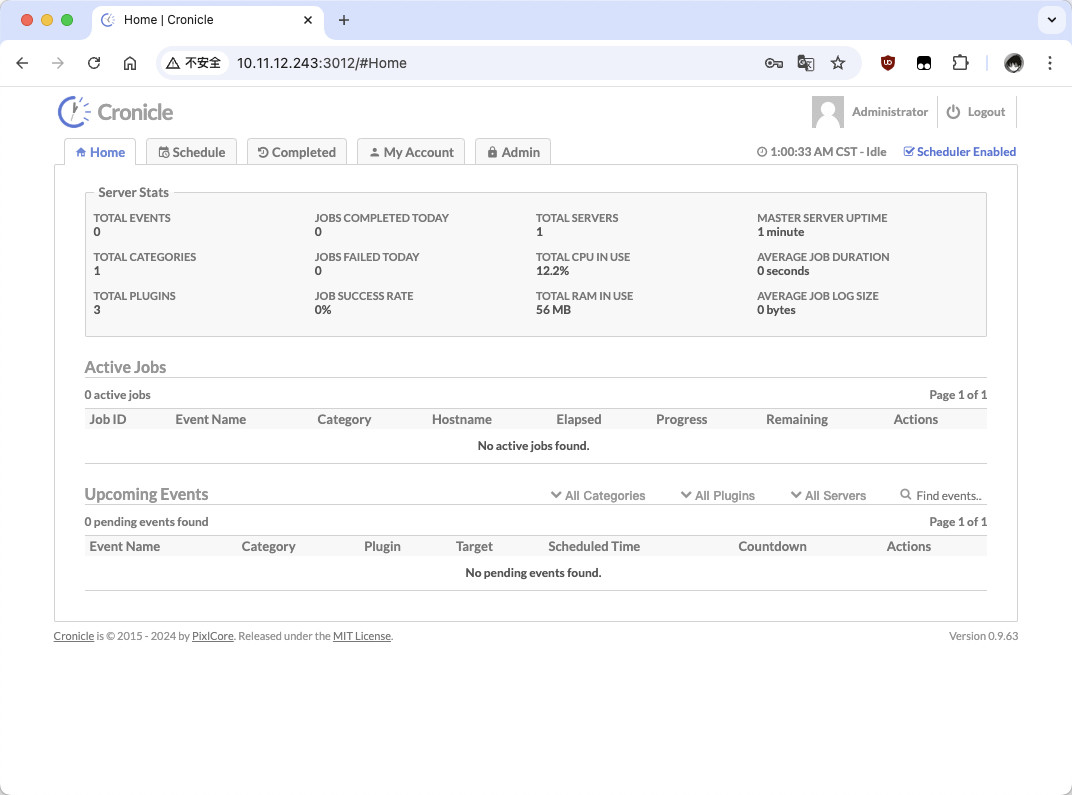
关于 Cronicle 的具体配置和使用方法,感兴趣的朋友可以自己探索一下,这里就不详细展开了。
在模型时代,它的最佳实践,值得至少单独写一篇文章来聊。
其他:玩客云的性能测试
每当提到“玩客云”这类设备时,总能够听到类似“这台设备性能不够”的声音。在 2025 年回顾这台老设备,性能不足运行当前的软件或者具备复杂特性的软件是一定的。
但是,倘若你只需要运行功能简单,目标单一的功能,这台日常运行 1~2 瓦,运行温度不高,静音的小盒子,还是一个非常不错的选择。伴随着 Linux 内核的版本迭代、社区软件的支持度的提高,盒子默认的硬件外接能力和可以运行的软件的丰富度也在提升。
顺手测试下当前设备的一些基础性能,让感兴趣的同学心里有数。
玩客云的 U 盘读写能力会稍好写,但也仅仅就是 USB 2.0 接口的水平。SD 卡相比之下会更弱一些,但其实满足 Linux 操作系统和简单软件的日常使用,毕竟这样不占用 USB 外接接口,发热也更低。
设置设备 CPU 运行频率
在进行性能测试前,我们可以让这台设备调整为更好的状态。
在 2016 年的 Armbian 的论坛反馈中,一位用户反馈将原始镜像切换为 Armbian 之后,性能损失很大。社区管理员给出了解决方案:
echo performance > /sys/devices/system/cpu/cpufreq/policy0/scaling_governor
当然,我们可以确定下当前的 CPU 支持哪些调度模式(支持 performance 模式):
# cat /sys/devices/system/cpu/cpu0/cpufreq/scaling_available_governors

ondemand performance schedutil
我们可以通过下面的命令,查看当前设备的 CPU 支持运行的频率:
# cat /sys/devices/system/cpu/cpu{0,1,2,3}/cpufreq/scaling_available_frequencies

96000 192000 312000 408000 504000 600000 720000 816000 1008000 1200000 1320000 1488000 1536000
96000 192000 312000 408000 504000 600000 720000 816000 1008000 1200000 1320000 1488000 1536000
96000 192000 312000 408000 504000 600000 720000 816000 1008000 1200000 1320000 1488000 1536000
96000 192000 312000 408000 504000 600000 720000 816000 1008000 1200000 1320000 1488000 1536000
分别执行下面的命令,将 CPU 的频率设置到最高。
for i in {0..3}; do
  echo userspace | sudo tee /sys/devices/system/cpu/cpu$i/cpufreq/scaling_governor
done

for i in {0..3}; do
  echo 1536000 | sudo tee /sys/devices/system/cpu/cpu$i/cpufreq/scaling_setspeed
done
然后执行 cpufreq-info 来查看设置是否生效:
# cpufreq-info | grep current
  current policy: frequency should be within 504 MHz and 1.54 GHz.
  current CPU frequency is 1.54 GHz (asserted by call to hardware).
  current policy: frequency should be within 504 MHz and 1.54 GHz.
  current CPU frequency is 1.54 GHz (asserted by call to hardware).
  current policy: frequency should be within 504 MHz and 1.54 GHz.
  current CPU frequency is 1.54 GHz (asserted by call to hardware).
  current policy: frequency should be within 504 MHz and 1.54 GHz.
  current CPU frequency is 1.54 GHz (asserted by call to hardware).
使用 Armbian 独有的 armbianmonitor -m 也能够查看当前频率设置是否生效。
# armbianmonitor -m
Stop monitoring using [ctrl]-[c]
Time        CPU    load %cpu %sys %usr %nice %io %irq   Tcpu  C.St.

12:01:13  1536 MHz  0.31   3%   0%   1%   0%   0%   0%  49.1 °C  0/4
12:01:18  1536 MHz  0.28   3%   1%   1%   0%   0%   0%  48.4 °C  0/4
12:01:23  1536 MHz  0.26   2%   1%   0%   0%   0%   0%  48.8 °C  0/4
12:01:29  1536 MHz  0.24   2%   1%   0%   0%   0%   0%  48.4 °C  0/4
12:01:34  1536 MHz  0.22   2%   1%   1%   0%   0%   0%  48.1 °C  0/4
当然,高性能模式的代价是,设备的运行功耗将从原本的 2 瓦,变成 3 瓦。
内存测试
我们先来进行内存性能测试,我使用的工具是 ssvb/tinymembench,下载代码,然后使用“一键三连”完成程序的编译,运行程序:
git clone https://github.com/ssvb/tinymembench.git
cd tinymembench/
make
./tinymembench
运行结果如下:
tinymembench v0.4.9 (simple benchmark for memory throughput and latency)

==========================================================================
== Memory bandwidth tests                                               ==
==                                                                      ==
== Note 1: 1MB = 1000000 bytes                                          ==
== Note 2: Results for 'copy' tests show how many bytes can be          ==
==         copied per second (adding together read and writen           ==
==         bytes would have provided twice higher numbers)              ==
== Note 3: 2-pass copy means that we are using a small temporary buffer ==
==         to first fetch data into it, and only then write it to the   ==
==         destination (source -> L1 cache, L1 cache -> destination)    ==
== Note 4: If sample standard deviation exceeds 0.1%, it is shown in    ==
==         brackets                                                     ==
==========================================================================

 C copy backwards                                     :    385.7 MB/s (1.5%)
 C copy backwards (32 byte blocks)                    :    422.2 MB/s (1.6%)
 C copy backwards (64 byte blocks)                    :    422.0 MB/s
 C copy                                               :    957.4 MB/s
 C copy prefetched (32 bytes step)                    :   1443.4 MB/s (5.9%)
 C copy prefetched (64 bytes step)                    :   1350.8 MB/s
 C 2-pass copy                                        :    675.6 MB/s (2.2%)
 C 2-pass copy prefetched (32 bytes step)             :   1002.8 MB/s
 C 2-pass copy prefetched (64 bytes step)             :    850.2 MB/s (2.0%)
 C fill                                               :   3613.6 MB/s (1.2%)
 C fill (shuffle within 16 byte blocks)               :   3613.2 MB/s (1.4%)
 C fill (shuffle within 32 byte blocks)               :   3600.3 MB/s (1.6%)
 C fill (shuffle within 64 byte blocks)               :   1271.4 MB/s (7.8%)
 ---
 standard memcpy                                      :    968.6 MB/s (2.1%)
 standard memset                                      :   2985.2 MB/s (0.8%)
 ---
 NEON read                                            :   1115.2 MB/s (1.8%)
 NEON read prefetched (32 bytes step)                 :   2000.4 MB/s (6.5%)
 NEON read prefetched (64 bytes step)                 :   1716.1 MB/s (4.4%)
 NEON read 2 data streams                             :   1121.5 MB/s (2.0%)
 NEON read 2 data streams prefetched (32 bytes step)  :   1829.0 MB/s (5.2%)
 NEON read 2 data streams prefetched (64 bytes step)  :   1741.4 MB/s
 NEON copy                                            :    920.1 MB/s
 NEON copy prefetched (32 bytes step)                 :   1466.2 MB/s (5.5%)
 NEON copy prefetched (64 bytes step)                 :   1275.5 MB/s
 NEON unrolled copy                                   :    933.4 MB/s (2.4%)
 NEON unrolled copy prefetched (32 bytes step)        :   1361.1 MB/s (5.9%)
 NEON unrolled copy prefetched (64 bytes step)        :   1543.0 MB/s (5.9%)
 NEON copy backwards                                  :    410.5 MB/s (2.2%)
 NEON copy backwards prefetched (32 bytes step)       :    548.1 MB/s
 NEON copy backwards prefetched (64 bytes step)       :    785.7 MB/s (2.5%)
 NEON 2-pass copy                                     :    706.0 MB/s
 NEON 2-pass copy prefetched (32 bytes step)          :   1081.0 MB/s (5.4%)
 NEON 2-pass copy prefetched (64 bytes step)          :    927.4 MB/s (2.6%)
 NEON unrolled 2-pass copy                            :    651.7 MB/s (1.6%)
 NEON unrolled 2-pass copy prefetched (32 bytes step) :    878.1 MB/s
 NEON unrolled 2-pass copy prefetched (64 bytes step) :    973.6 MB/s (2.6%)
 NEON fill                                            :   3614.2 MB/s (1.6%)
 NEON fill backwards                                  :   3612.2 MB/s (1.0%)
 VFP copy                                             :    961.3 MB/s (3.1%)
 VFP 2-pass copy                                      :    681.4 MB/s (1.9%)
 ARM fill (STRD)                                      :   2985.0 MB/s (0.8%)
 ARM fill (STM with 8 registers)                      :   3614.9 MB/s (1.3%)
 ARM fill (STM with 4 registers)                      :   3613.3 MB/s (1.5%)
 ARM copy prefetched (incr pld)                       :   1450.9 MB/s (4.2%)
 ARM copy prefetched (wrap pld)                       :   1424.5 MB/s
 ARM 2-pass copy prefetched (incr pld)                :    929.6 MB/s (4.7%)
 ARM 2-pass copy prefetched (wrap pld)                :    916.5 MB/s

==========================================================================
== Memory latency test                                                  ==
==                                                                      ==
== Average time is measured for random memory accesses in the buffers   ==
== of different sizes. The larger is the buffer, the more significant   ==
== are relative contributions of TLB, L1/L2 cache misses and SDRAM      ==
== accesses. For extremely large buffer sizes we are expecting to see   ==
== page table walk with several requests to SDRAM for almost every      ==
== memory access (though 64MiB is not nearly large enough to experience ==
== this effect to its fullest).                                         ==
==                                                                      ==
== Note 1: All the numbers are representing extra time, which needs to  ==
==         be added to L1 cache latency. The cycle timings for L1 cache ==
==         latency can be usually found in the processor documentation. ==
== Note 2: Dual random read means that we are simultaneously performing ==
==         two independent memory accesses at a time. In the case if    ==
==         the memory subsystem can't handle multiple outstanding       ==
==         requests, dual random read has the same timings as two       ==
==         single reads performed one after another.                    ==
==========================================================================

block size : single random read / dual random read
      1024 :    0.0 ns          /     0.0 ns
      2048 :    0.0 ns          /     0.0 ns
      4096 :    0.0 ns          /     0.0 ns
      8192 :    0.0 ns          /     0.0 ns
     16384 :    0.0 ns          /     0.0 ns
     32768 :    0.0 ns          /     0.0 ns
     65536 :    8.4 ns          /    13.1 ns
    131072 :   12.5 ns          /    16.9 ns
    262144 :   14.7 ns          /    18.2 ns
    524288 :   29.2 ns          /    47.8 ns
   1048576 :   87.0 ns          /   131.9 ns
   2097152 :  121.6 ns          /   169.1 ns
   4194304 :  139.8 ns          /   185.0 ns
   8388608 :  152.0 ns          /   195.7 ns
  16777216 :  162.5 ns          /   206.0 ns
  33554432 :  173.7 ns          /   222.8 ns
  67108864 :  187.7 ns          /   249.0 ns
CPU 测试
CPU 性能测试,我们使用开源软件 akopytov/sysbench,先进行安装:
sudo apt-get -y install sysbench
安装完毕,调用所有核心,测试一分钟:
sysbench cpu --threads=$(nproc --all) --time=60 run
测试结果如下:
CPU speed:
    events per second:   208.63

General statistics:
    total time:                          60.0176s
    total number of events:              12523

Latency (ms):
         min:                                   18.71
         avg:                                   19.17
         max:                                   67.78
         95th percentile:                       20.00
         sum:                               240007.20

Threads fairness:
    events (avg/stddev):           3130.7500/5.21
    execution time (avg/stddev):   60.0018/0.00
上点难度再测一次:
sysbench cpu --threads=$(nproc --all) --time=60 --cpu-max-prime=20000 run
测试结果如下:
CPU speed:
    events per second:    78.57

General statistics:
    total time:                          60.0448s
    total number of events:              4718

Latency (ms):
         min:                                   49.70
         avg:                                   50.88
         max:                                  128.69
         95th percentile:                       53.85
         sum:                               240073.14

Threads fairness:
    events (avg/stddev):           1179.5000/2.87
    execution time (avg/stddev):   60.0183/0.01
存储性能测试(SD 卡)
我们可以使用简单的命令,先来测试玩客云 SD 卡上的性能表现。
首先,使用 dd 连续写入 1GB 大文件进行测试。
dd if=/dev/zero of=test.file bs=1G count=1 oflag=direct
测试结果在 5.3MB/s,多次测试最高大概 6~7 MB/s。
# dd if=/dev/zero of=test.file bs=1G count=1 oflag=direct
1+0 records in
1+0 records out
1073741824 bytes (1.1 GB, 1.0 GiB) copied, 201.556 s, 5.3 MB/s
如果你写入的文件小一些,速度可以写到 8 MB/s。
# dd if=/dev/zero of=test.file bs=100M count=1 oflag=direct
1+0 records in
1+0 records out
104857600 bytes (105 MB, 100 MiB) copied, 12.624 s, 8.3 MB/s
接着,我们来测试读取速度,还是使用 dd 命令。
dd if=test.file of=/dev/null bs=1G count=1
相比较写入,读取 1GB 文件的速度大概在 13 MB/s。
dd if=test.file of=/dev/null bs=1G count=1
1+0 records in
1+0 records out
1073741824 bytes (1.1 GB, 1.0 GiB) copied, 79.9265 s, 13.4 MB/s
同样的,如果选择读取的文件内容小一些(100MB),速度还能够有所提升,来到 14 MB/s。
# dd if=test.file of=/dev/null bs=100M count=1
1+0 records in
1+0 records out
104857600 bytes (105 MB, 100 MiB) copied, 7.35237 s, 14.3 MB/s
存储性能测试(U盘)
这里测试使用了一块固态 U 盘,避免 U 盘性能成为它的测试瓶颈。U 盘相关的内容可以参考:《硬件笔记:组装“固态 U 盘”的八年,从 100 块到 1000 块》。
给设备插上 U 盘,使用 dmesg 可以看到设备识别信息:
[45547.891164] GPT: Use GNU Parted to correct GPT errors.
[45547.891218] sda: sda1 sda2 sda3 sda4
[45547.899251] sd 0:0:0:0: [sda] Attached SCSI disk
因为设备有“错误提示”,所以我们在测试前要先对 U 盘进行修正和格式化(之前是 PVE 的引导安装盘)。
# 查看了解分区信息
fdisk -l /dev/sda
# 使用 parted 修复 GPT 错误
parted /dev/sda

# 在 parted 中执行:
mklabel gpt
quit
格式化并创建新分区:
# 开始重新操作磁盘
fdisk /dev/sda

# 在 fdisk 中:
p
n
回车
回车
回车
w

# 回到终端,格式化为 ext4
mkfs.ext4 /dev/sda1
将磁盘挂载到系统中:
# 创建挂载点
mkdir -p /data

# 挂载分区
mount /dev/sda1 /data
接着,我们来进行读写测试,写入 100M,速度在 188MB/s :
# dd if=/dev/zero of=/data/test.file bs=1M count=100

100+0 records in
100+0 records out
104857600 bytes (105 MB, 100 MiB) copied, 0.559078 s, 188 MB/s
连续写入一个 1GB 的文件,速度大概不到 30MB/s:
# dd if=/dev/zero of=/data/test.file bs=1G count=1 oflag=direct

1+0 records in
1+0 records out
1073741824 bytes (1.1 GB, 1.0 GiB) copied, 36.8615 s, 29.1 MB/s
换一个写入方式,分小块多次写入,速度大概是 34MB/s:
# dd if=/dev/zero of=/data/test.file bs=1M count=1000 oflag=direct
1000+0 records in
1000+0 records out
1048576000 bytes (1.0 GB, 1000 MiB) copied, 30.5348 s, 34.3 MB/s
测试文件的读取,连续读取 1GB 的文件,速度在 36MB/s:
# dd if=/data/test.file of=/dev/null bs=1G count=1

0+1 records in
0+1 records out
1048576000 bytes (1.0 GB, 1000 MiB) copied, 28.9336 s, 36.2 MB/s
测试小一些的文件,速度在 37MB/s 和上面差不多:
# dd if=/data/test.file of=/dev/null bs=100M count=1
1+0 records in
1+0 records out
104857600 bytes (105 MB, 100 MiB) copied, 2.81501 s, 37.2 MB/s
网络测试
下载并安装 iperf3,准备进行网络速度测试:
sudo apt-get install -y iperf3
在玩客云上执行 iperf3 -s,然后在客户端执行 iperf3 -c 测试网络性能,还是能跑满千兆的:
-----------------------------------------------------------
Server listening on 5201 (test #1)
-----------------------------------------------------------
Accepted connection from 10.11.12.241, port 60367
[  5] local 10.11.12.243 port 5201 connected to 10.11.12.241 port 60368
[ ID] Interval           Transfer     Bitrate
[  5]   0.00-1.00   sec   112 MBytes   935 Mbits/sec
[  5]   1.00-2.00   sec   112 MBytes   942 Mbits/sec
[  5]   2.00-3.00   sec   111 MBytes   932 Mbits/sec
[  5]   3.00-4.00   sec   109 MBytes   913 Mbits/sec
[  5]   4.00-5.00   sec   112 MBytes   942 Mbits/sec
[  5]   5.00-6.00   sec   112 MBytes   942 Mbits/sec
[  5]   6.00-7.00   sec   112 MBytes   940 Mbits/sec
[  5]   7.00-8.00   sec   112 MBytes   943 Mbits/sec
[  5]   8.00-9.00   sec   109 MBytes   914 Mbits/sec
[  5]   9.00-10.00  sec   112 MBytes   942 Mbits/sec
[  5]  10.00-10.01  sec  1.12 MBytes   951 Mbits/sec
- - - - - - - - - - - - - - - - - - - - - - - - -
[ ID] Interval           Transfer     Bitrate
[  5]   0.00-10.01  sec  1.09 GBytes   934 Mbits/sec                  receiver
看到这里,你应该对这台设备的基础性能就也有了更进一步的直观了解了。在一些比较“垂直定向”的任务中,这个设备的性能其实是非常够的,并且还能够通过一些方法进一步“增强”,这些留给后面的文章来聊吧。
最后
好了,今天的文章就先写到这里。这篇文章里,我们解决了之前文章中提到的一些“小作业”。到这里,玩客云稳定运行的基础就都具备了:稳定可靠的引导程序和引导策略(减少 eMMC 读写),稳定可靠的系统镜像,适当的冗余(硬件和电源,可选)。
在接下来的文章中,我会继续分享如何让这台设备变得更加实用和有趣。
下篇文章,再见。
–EOF