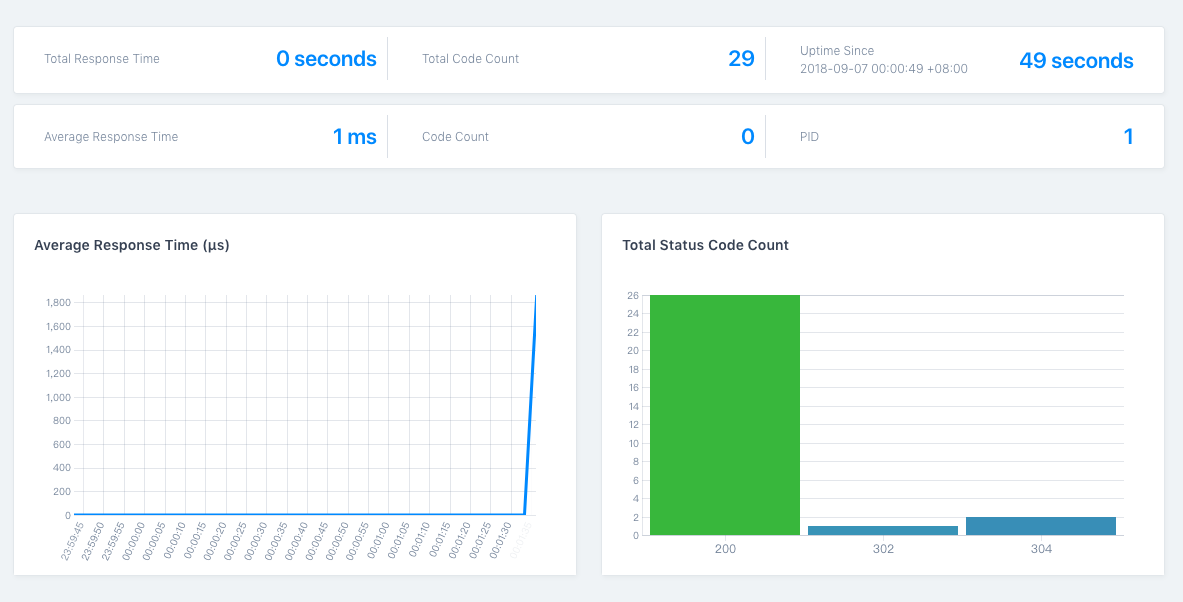
之前我写了不少配合 Traefik 进行服务注册并提供弹性伸缩后自动进行负载均衡的例子,也贴过它的配置,但是似乎一直没有详细的解释过关于 Traefik 配置和使用的文章,考虑了一下,应该写一篇聊聊。
Traefik 是什么又能做什么

如果看过我之前的文章,那么你会 Traefik 这个软件应该有一些简单的理解,提供类似 Nginx 的负载能力,不同的是可以自动化配置 “upstream”,或者说是免配置即开即食的consul。官方的定义如下:
A reverse proxy / load balancer that’s easy, dynamic, automatic, fast, full-featured, open source, production proven, provides metrics, and integrates with every major cluster technologies… No wonder it’s so popular!
简单来说就是,不论你用它来做负载均衡还是反向代理,都是符合它的设计理念的,也提供了大量的功能支撑,让你能够在不同的业务场景下,简单的配置就能实现一定规模的高性能应用。
实际使用的话,不论是配合 K8S、compose、Etcd、rancher、tradition docker都是可以的。
我个人使用在 compose 的场景下,以下配置皆以此为例,其他环境配置大体一致,细节稍有不同,等回头买几台微塔服务器,再折腾个人的 K8S 吧(毕竟单节点没什么意思)。
适合的场景
- 如果你的机器或者 IP 资源有限,但是你却需要部署多个站点,又期望能够让站点应用保持高度隔离。
- 你已经厌烦传统方案中使用
haproxy或者nginx对于多个应用的前后端扩容修改要来回修改的麻烦事儿。 - 你不想在服务端挂载
SSL,配置加密算法,添加gzip等本该Gateway提供的能力,希望让每一层的功能保持简单纯粹。 - 1分钟内拥有有一个轻量高效的本地开发环境。
如何配置
下面以最新的稳定版本 1.6.x 为例,演示如何快速搭建你的应用网关,docker-compose.yml 配置文件比较简短,我们可以先看一下:
version: '3'

services:
  reverse-proxy:
    image: traefik:1.6.6-alpine
    restart: always
    container_name: traefik
    ports:
      - 80:80
      - 443:443
      - 127.0.0.1:4399:4399
      - 127.0.0.1:4398:4398
    networks:
      - traefik
    command: traefik -c /etc/traefik.toml
    volumes:
# 仅限标准的 Linux 环境
#      - /etc/localtime:/etc/localtime
#      - /etc/timezone:/etc/timezone
      - /var/run/docker.sock:/var/run/docker.sock
      - ./traefik.toml:/etc/traefik.toml
      - ./ssl/lab.com.key:/data/ssl/lab.com.key
      - ./ssl/lab.com.crt:/data/ssl/lab.com.crt
      - ./logs:/data/logs

networks:
  traefik:
    external: true
查看配置可以发现我将外部的一些文件和配置映射到了容器内部,并对外公开了 80 、和 443 端口,默认的两个端口被我映射到了容器的 127.0.0.1 ,应用的日志则被保存了出来。
这里如果使用的是标准的 Linux 发行版,可以考虑将时区和宿主机的时间映射到容器内部,保障时间一致,如果是 OSX 系统的话,可以忽略这点。
你可能会问,如果将管理端口和健康检查的端口进行了非公开暴露,那么怎么才能能够进行常规的管理查看和健康检查呢,答案很简单,配合 traefik.toml 配置文件中的 file 功能,在其中定义反向代理的规则即可,稍后会详细描述。
Traefik 支持配置的功能很多,需要注意的是,如果你在入口点配置了 HTTP 协议自动跳转 HTTPS,那么所有的入口点都会进行跳转,你将无法提供 HTTP 服务,所以下面这段注释掉的内容,视你的情况选择是否使用。
    [entryPoints.http]
        address = ":80"
        compress = true
# 根据自己情况选择是否进行自动跳转
#        [entryPoints.http.redirect]
#            entryPoint = "https"
如果你使用它作为前端,装载多个不同域名的证书,实现 SNI 功能,那么只需要多添加一个字段即可同时支持 lab.com 和 lab2.com 的加密访问:
    [entryPoints.https.tls]
        [[entryPoints.https.tls.certificates]]
            certFile = "/data/ssl/lab.com.crt"
            keyFile = "/data/ssl/lab.com.key"
        [[entryPoints.https.tls.certificates]]
            certFile = "/data/ssl/lab2.com.crt"
            keyFile = "/data/ssl/lab2.com.key"

关于健康检查和管理界面,默认的路径比较丑陋,必须使用指定端口访问,但是使用 [file] 字段,先将默认的端口定义为你的“后端”服务地址,然后再添加两个不同的前端路由,即可使用浏览器默认的端口进行访问。
[file]
    [backends]
        [backends.dashboard]
            [backends.dashboard.servers.server1]
                url = "http://127.0.0.1:4399"
        [backends.ping]
            [backends.ping.servers.server1]
                url = "http://127.0.0.1:4398"

    [frontends]
        [frontends.dashboard]
            entrypoints = ["https"]
            backend = "dashboard"
            [frontends.dashboard.routes.route01]
                rule = "Host:dashboard.lab.com"
        [frontends.ping]
            entrypoints = ["https"]
            backend = "ping"
            [frontends.ping.routes.route01]
                rule = "Host:ping.lab.com"
            [frontends.ping.routes.route02]
                rule = "ReplacePathRegex: ^/ /ping"
参考上面的例子,当你直接访问 dashboard.lab.com ,首先会跳转到 https 协议,然后再展示管理界面。
而原来需要访问 xxx.xxx.xxx.xxx:4398/ping 去实现健康监控,只需要访问 ping.lab.com 即可(这里涉及到路由重写)。

下面是 traefik.toml 的完整配置。
###############################################################
# 全局设置
################################################################

# 激活调试模式 (默认关闭)
debug = false

# 日志等级 (默认 ERROR)
logLevel = "INFO"

# 全局入口点类型 (默认 http)
defaultEntryPoints = ["http", "https"]

# 不上报统计信息
sendAnonymousUsage = false

################################################################
# 入口点设置
################################################################

[entryPoints]

    # 默认前端
    [entryPoints.http]
        address = ":80"
        compress = true
# 根据自己情况选择是否进行自动跳转
#        [entryPoints.http.redirect]
#            entryPoint = "https"
    [entryPoints.https]
        address = ":443"
        compress = true
    [entryPoints.https.tls]
        [[entryPoints.https.tls.certificates]]
            certFile = "/data/ssl/lab.com.crt"
            keyFile = "/data/ssl/lab.com.key"

    # 控制台端口
    [entryPoints.traefik-api]
        address = ":4399"
# 如果不想公开控制台,可以参考下面的配置生成你自己的 BA 账号密码
#        [entryPoints.traefik-api.auth]
#            [entryPoints.traefik-api.auth.basic]
                #htpasswd -nb soulteary soulteary
                users = ["soulteary:$apr1$hVv8KPU8$IiTLEE5QYKgd4mZuCXpOD."]
        [entryPoints.traefik-api.redirect]
            entryPoint = "https"

    # Ping端口
    [entryPoints.traefik-ping]
        address = ":4398"
        [entryPoints.traefik-ping.redirect]
            entryPoint = "https"

################################################################
# Traefik File configuration
################################################################

[file]
    [backends]
        [backends.dashboard]
            [backends.dashboard.servers.server1]
                url = "http://127.0.0.1:4399"
        [backends.ping]
            [backends.ping.servers.server1]
                url = "http://127.0.0.1:4398"

    [frontends]
        [frontends.dashboard]
            entrypoints = ["https"]
            backend = "dashboard"
            [frontends.dashboard.routes.route01]
                rule = "Host:dashboard.lab.com"
        [frontends.ping]
            entrypoints = ["https"]
            backend = "ping"
            [frontends.ping.routes.route01]
                rule = "Host:ping.lab.com"
            [frontends.ping.routes.route02]
                rule = "ReplacePathRegex: ^/ /ping"

################################################################
# Traefik logs configuration
################################################################

# Traefik logs
# Enabled by default and log to stdout
#
# Optional
#
# Default: os.Stdout
[traefikLog]
  filePath = "/data/logs/traefik.log"

[accessLog]
  filePath = "/data/logs/access.log"

# Format is either "json" or "common".
#
# Optional
# Default: "common"
#
# format = "common"

################################################################
# 访问日志 配置
################################################################

# Enable access logs
# By default it will write to stdout and produce logs in the textual
# Common Log Format (CLF), extended with additional fields.
#
# Optional
#
# [accessLog]

# Sets the file path for the access log. If not specified, stdout will be used.
# Intermediate directories are created if necessary.
#
# Optional
# Default: os.Stdout
#
# filePath = "/path/to/log/log.txt"

# Format is either "json" or "common".
#
# Optional
# Default: "common"
#
# format = "common"

################################################################
# API 及 控制台 配置
################################################################

# 启用API以及控制台
[api]
    # 入口点名称
    entryPoint = "traefik-api"

    # 开启控制台(默认开启)
    dashboard = true

    # 默认协议
    defaultEntryPoints = ["http"]

################################################################
# Ping 配置
################################################################

# 启用 ping
[ping]
    # 入口点名称
    entryPoint = "traefik-ping"

################################################################
# Docker 后端配置
################################################################

# 启用Docker后端
[docker]

# Docker服务后端
endpoint = "unix:///var/run/docker.sock"
# 默认域名
domain = "traefix.lab.com"
# 监控docker变化
watch = true

# 使用自定义模板(可选)
# filename = "docker.tmpl"

# 对容器默认进行暴露(默认开启)
#   如果关闭选项,则容器不包含 `traefik.enable=true` 标签,就不会被暴露
exposedbydefault = false

# 使用绑定端口的IP地址取代内部私有网络(默认关闭)
usebindportip = false

# 使用 Swarm Mode (默认关闭)
swarmmode = false

# Enable docker TLS connection.
#
# Optional
#
#  [docker.tls]
#  ca = "/etc/ssl/ca.crt"
#  cert = "/etc/ssl/docker.crt"
#  key = "/etc/ssl/docker.key"
#  insecureskipverify = true
相关资源
如果你有更多对 Header 的定制需求,或者转发需求,可以了解一下下面的文档。
当然如果你想要配合 UFW(iptable) 使用,那么可以参考这篇文章,直接裸跑 Traefik。
其他
Traefik 的介绍就先到这里,或许等 1.7 正式发布后,我会更新额外的内容。
–EOF