本篇是系列中的第四篇内容,我们继续聊聊如何把一个简化过的私有云环境部署在笔记本里,以满足低成本、低功耗、低延时的实验环境。
在前三篇文章中,我们聊过了基础虚拟化相关的前置准备、以及为了避免在搭建过程中盲人摸象,而准备的监控服务,还有上一篇基础存储服务的搭建。接下来我们来进行一些基础的监控配置以及监控服务完善,让存储服务能够相对稳定的运行在我们的“视野之内”。
写在前面
在前文中,我们提到了包括 Prometheus 在内的监控服务的工作模式主要有“推”和“拉”两种。为了能够使用推送模式,我们部署了 “推送网关:Push-Gateway”,但是“拉”模式就是开箱即用的吗?
除了一些云原生的应用外,默认应用多数并不包含能够让 Prometheus 能够开箱即用的,能够让 Prometheus 进行数据拉取的,包含应用性能指标数据的接口。
对于这些应用,为了能够让监控服务和它们能够进行持续的“数据交互”,我们得在需要监控的应用侧搭建一些数据上报服务,提供这个“数据开放”的能力。这些服务一般被称作“exporter”,它会根据应用的实际情况,采取使用应用 API 、文件监控、应用数据读取等方式将应用当前的运行状态汇总,在 Prometheus 进行数据抓取的时候进行提供,这些提供的数据一般被称作 “metrics”。
那么,我们就来挨着聊聊前文中提到的几个服务的监控集成,恰好它们的监控配置都比较典型。本文中提到的应用配置,同样已经上传到了 GitHub 中,有需要的同学可以自取。
MinIO 的监控集成
第一个要聊的应用,是典型的云原生应用,它自带了能够让 Prometheus 开箱即用的接口。但是,考虑到应用性能以及运营数据的隐私要求,这个接口默认并不是默认开启的。
开启 MinIO 的性能指标接口
为了能够让 Prometheus 对 MinIO 进行监控,我们需要先将它的性能指标接口通过配置变量的方式开启,编辑上文提到的 docker-compose.yml 文件,添加一个新的环境变量:
    environment:
      - MINIO_PROMETHEUS_AUTH_TYPE=public
这里对于这个配置可选数值还有 jwt,不过并不推荐,因为我们系列最终会使用 Traefik 进行统一鉴权管理,没有必要再加一层。如果你对另外一个模式感兴趣,可以自行了解。
更新完配置后,我们使用 docker-compose down && docker-compose up -d 重启应用,MinIO 的监控接口便准备就绪啦,我们可以使用下面的地址进行访问性测试:
curl http://s3.storage.lab.com/minio/v2/metrics/cluster
如果顺利的话,你将会看到类似下面的内容:
# HELP minio_bucket_objects_size_distribution Distribution of object sizes in the bucket, includes label for the bucket name.
# TYPE minio_bucket_objects_size_distribution gauge
minio_bucket_objects_size_distribution{bucket="public",range="BETWEEN_1024_B_AND_1_MB",server="127.0.0.1:9000"} 1
minio_bucket_objects_size_distribution{bucket="public",range="BETWEEN_10_MB_AND_64_MB",server="127.0.0.1:9000"} 0
minio_bucket_objects_size_distribution{bucket="public",range="BETWEEN_128_MB_AND_512_MB",server="127.0.0.1:9000"} 0
minio_bucket_objects_size_distribution{bucket="public",range="BETWEEN_1_MB_AND_10_MB",server="127.0.0.1:9000"} 0
minio_bucket_objects_size_distribution{bucket="public",range="BETWEEN_64_MB_AND_128_MB",server="127.0.0.1:9000"} 0
minio_bucket_objects_size_distribution{bucket="public",range="GREATER_THAN_512_MB",server="127.0.0.1:9000"} 0
minio_bucket_objects_size_distribution{bucket="public",range="LESS_THAN_1024_B",server="127.0.0.1:9000"} 0
# HELP minio_bucket_replication_received_bytes Total number of bytes replicated to this bucket from another source bucket.
# TYPE minio_bucket_replication_received_bytes gauge
minio_bucket_replication_received_bytes{bucket="public",server="127.0.0.1:9000"} 0
# HELP minio_bucket_usage_object_total Total number of objects
...
(上面打印出来的的内容,就是我们前文中提到的 Prometheus 实际工作时,进行定时抓取的性能指标数据。)
配置 Prometheus 抓取 MinIO 性能指标数据
在上报数据就绪后,我们来配置 Prometheus 的抓取配置,让这个数据能够持续的写入 Prometheus 的时序数据库中。
在监控篇中,我们提到了 Prometheus 的部署和配置,其中主要的抓取配置都保存在了 config/prometheus.yml,所以我们需要继续修改这个配置,让它能够抓取 MinIO。
  - job_name: minio
    scrape_interval: 10s
    metrics_path: /minio/v2/metrics/cluster
    scheme: http
    static_configs:
    - targets: ['s3.storage.lab.com']
更新完毕配置后,同样使用 docker-compose down && docker-compose up -d 重启 prometheus,然后在浏览器中访问:http://monitor.lab.com:9090/targets,在列表中就能看到 MinIO 已经被正确的作为新的数据源使用啦。

为 MinIO 配置 Grafana 监控面板
为了直观的观测 MinIO 的运行状况,我们可以继续在 Grafana 中为 MinIO 配置一个监控面板。MinIO 官方已经将一个比较通用的模版上传到了 Grafana 模版市场,我们可以直接进行使用。
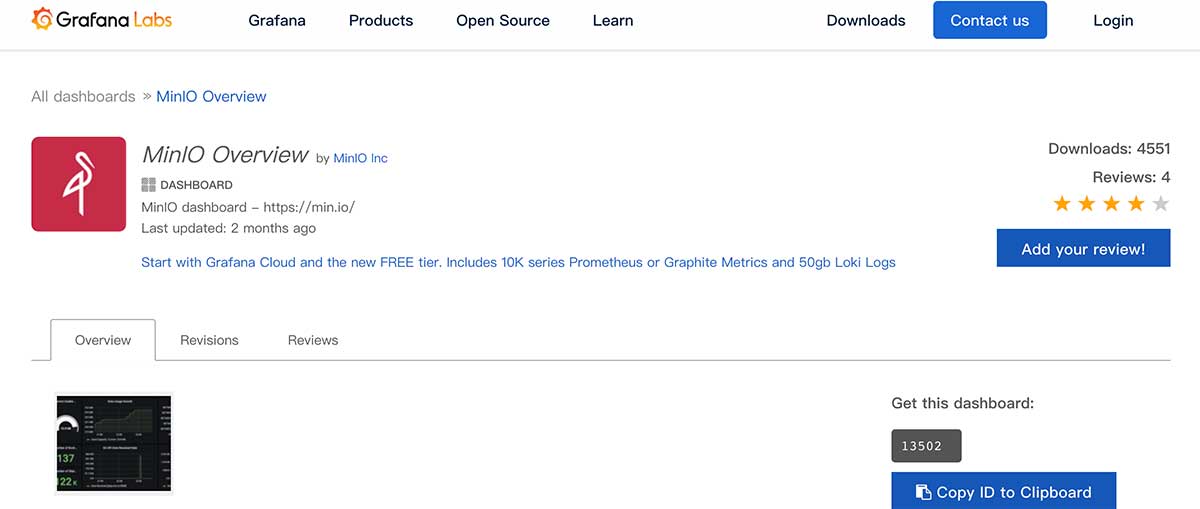
参考监控篇中的“Grafana 控制面板导入”方式,将编号“13502”的面板导入 Grafana 中,就可以看到下面的监控面板界面了。

可以看到上面的界面中出现了非常多的 “N/A”,这是因为 Grafana 并不知道我们要使用哪一个上报的应用数据进行展示,在界面的左上角筛选并使用“minio”(上一小节在 Prometheus 抓取配置中配置的内容)之后,我们就能够看到正确的监控界面了。

接着来聊聊另外一种普通应用的监控配置方式。
Syncthing 的监控集成
和 MinIO 不同的是,Syncthing 原生虽然支持通过 API 进行应用运行数据查询,但是它并不符合 Prometheus 的监控数据格式要求,所以我们需要为它搭建一个监控指标接口服务( exporter )进行数据暴露,以及配置 Prometheus 对它进行数据抓取。
配置 Syncthing 性能指标服务
关于 Syncthing Exporter 的运行细节,可以围观 GitHub 的仓库。为了更好的执行性能,我将这个项目的容器镜像进行了重新构建,并上传到了 https://github.com/soulteary/syncthing_exporter。镜像已经推送到了 DockerHub,所以,你可以通过下面的方式获取这个更小的容器镜像(压缩后仅有12M):
docker pull soulteary/syncthing-exporter
访问 https://syncthing.storage.lab.com ,点击顶部导航栏右侧的操作按钮,选择“高级”配置菜单,在弹出的对话框里获取我们接下来要使用的“API KEY”。
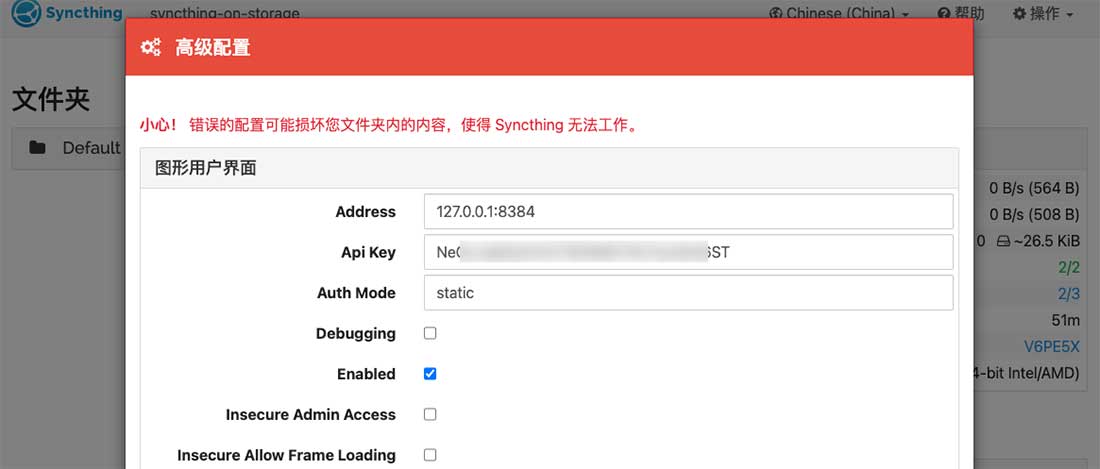
接着,编辑上篇文章中提到的 Syncthing 环境变量配置文件 .env,在文件尾部添加下面的内容,并使用刚刚获取的 API 替换下面的“DOCKER_EXPORTER_API_TOKEN”中的内容:
# == exporter
DOCKER_EXPORTER_IMAGE_NAME=soulteary/syncthing-exporter
DOCKER_EXPORTER_API_TOKEN=YOUR_API_TOKEN
DOCKER_EXPORTER_HOSTNAME=syncthing-exporter-on-storage
DOCKER_EXPORTER_DOMAIN=syncthing-exporter.storage.lab.com
然后,编写 Exporter 的容器配置 docker-compose.exporter.yml:
version: "3"

services:
  syncthing-exporter:
    image: ${DOCKER_EXPORTER_IMAGE_NAME}
    container_name: DOCKER_EXPORTER_HOSTNAME
    expose:
      - 9093
    restart: always
    environment:
      SYNCTHING_URI: "http://${DOCKER_SYNCTHING_HOSTNAME}:8384/"
      SYNCTHING_TOKEN: ${DOCKER_EXPORTER_API_TOKEN}
    labels:
      - "traefik.enable=true"
      - "traefik.docker.network=traefik"

      - "traefik.http.routers.sync-exporter-http.entrypoints=http"
      - "traefik.http.routers.sync-exporter-http.rule=Host(`${DOCKER_EXPORTER_DOMAIN}`)"
      - "traefik.http.routers.sync-exporter-http.service=sync-exporter-backend"

      - "traefik.http.routers.sync-exporter-https.entrypoints=https"
      - "traefik.http.routers.sync-exporter-https.tls=true"
      - "traefik.http.routers.sync-exporter-https.rule=Host(`${DOCKER_EXPORTER_DOMAIN}`)"
      - "traefik.http.routers.sync-exporter-https.service=sync-exporter-backend"

      - "traefik.http.services.sync-exporter-backend.loadbalancer.server.scheme=http"
      - "traefik.http.services.sync-exporter-backend.loadbalancer.server.port=9093"
    networks:
      - traefik
    logging:
      driver: "json-file"
      options:
        max-size: "1m"

networks:
  traefik:
    external: true
使用 docker-compose -f docker-compose.exporter.yml up -d 启动应用。如果你使用 docker logs 查看这个新创建的容器,会看到类似下面的日志:
level=info ts=2021-11-09T13:11:20.621Z caller=main.go:94 msg="Starting syncthing_exporter" version="(version=0.3.2, branch=main, revision=84736272309b3b08d6b6feb08cc7d41f13b4cd5e)"
level=info ts=2021-11-09T13:11:20.621Z caller=main.go:95 msg="Build context" build_context="(go=go1.17.3, user=local, date=09 Nov 2021 10:20:09 UTC)"
level=info ts=2021-11-09T13:11:20.621Z caller=main.go:108 msg="Listening on" address=:9093
同样使用命令查看服务的可访问性:
curl http://syncthing-exporter.storage.lab.com/metrics
会看到和前文中类似的日志数据:
# HELP go_gc_duration_seconds A summary of the pause duration of garbage collection cycles.
# TYPE go_gc_duration_seconds summary
go_gc_duration_seconds{quantile="0"} 2.2292e-05
go_gc_duration_seconds{quantile="0.25"} 2.2292e-05
go_gc_duration_seconds{quantile="0.5"} 2.2292e-05
go_gc_duration_seconds{quantile="0.75"} 2.2292e-05
go_gc_duration_seconds{quantile="1"} 2.2292e-05
go_gc_duration_seconds_sum 2.2292e-05
go_gc_duration_seconds_count 1
# HELP go_goroutines Number of goroutines that currently exist.
# TYPE go_goroutines gauge
go_goroutines 11
# HELP go_info Information about the Go environment.
# TYPE go_info gauge
go_info{version="go1.17.3"} 1
# HELP go_memstats_alloc_bytes Number of bytes allocated and still in use.
# TYPE go_memstats_alloc_bytes gauge
go_memstats_alloc_bytes 3.236424e+06
# HELP go_memstats_alloc_bytes_total Total number of bytes allocated, even if freed.
# TYPE go_memstats_alloc_bytes_total counter
go_memstats_alloc_bytes_total 4.851856e+06
# HELP go_memstats_buck_hash_sys_bytes Number of bytes used by the profiling bucket hash table.
# TYPE go_memstats_buck_hash_sys_bytes gauge
...
配置 Prometheus 抓取 Syncthing 性能指标数据
在上报数据就绪后,我们继续来配置 Prometheus 的数据抓取配置,让这个数据能够同样持续的写入 Prometheus 的数据库。继续编辑 config/prometheus.yml 配置文件:
  - job_name: syncthing
    scrape_interval: 10s
    metrics_path: /metrics
    scheme: http
    static_configs:
      - targets: ['syncthing-exporter.storage.lab.com']
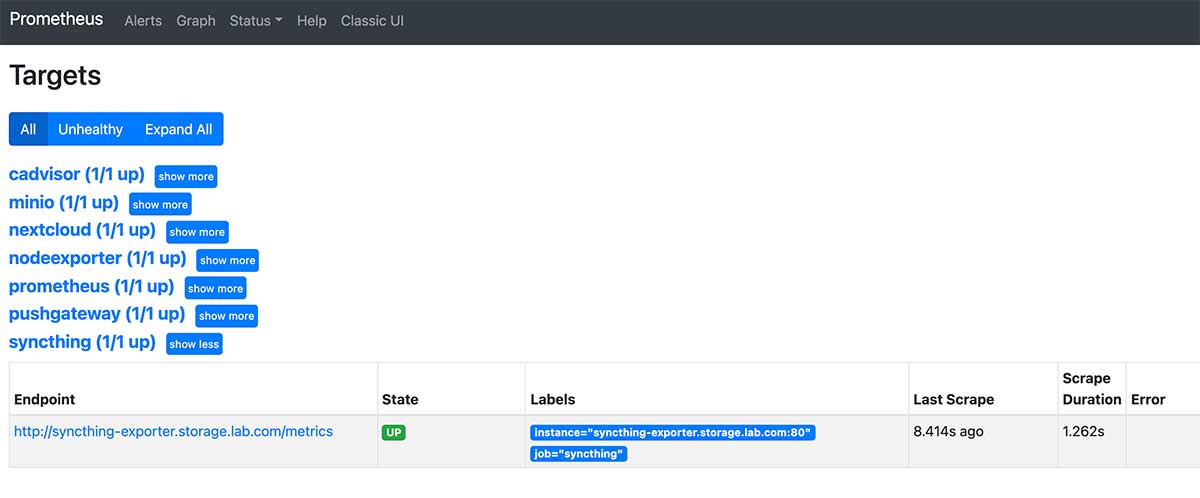
更新完上面的配置后,使用 docker-compose down && docker-compose up -d 重启 prometheus,然后在浏览器中访问:http://monitor.lab.com:9090/targets,列表中便会出现 Syncthing 的数据源了。
为 Syncthing 配置 Grafana 监控面板
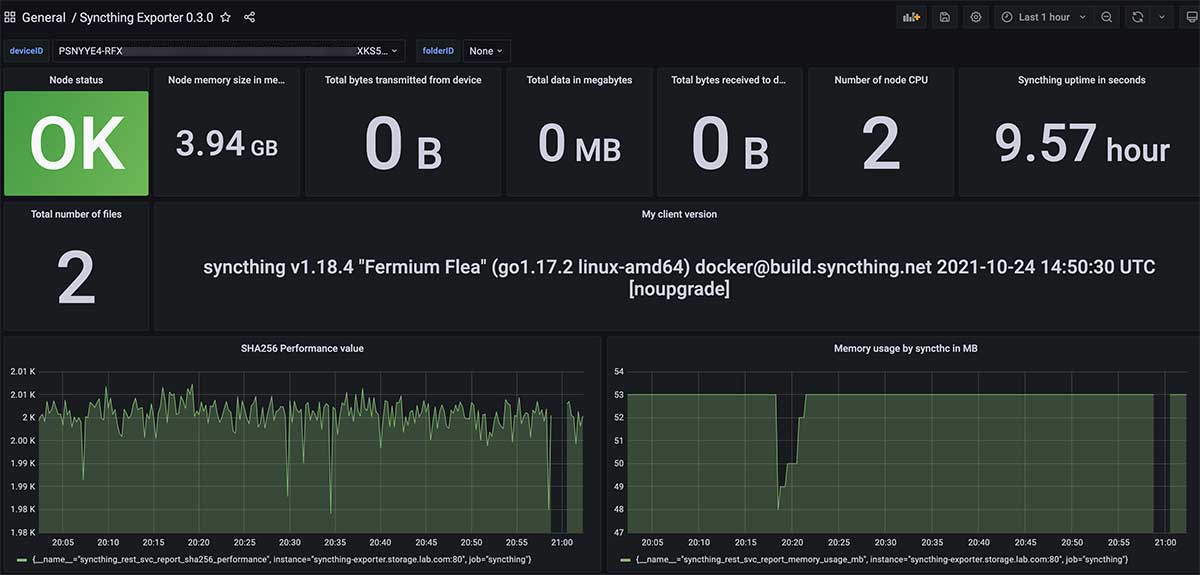
Syncthing 在 Grafana 官方面板市场中并没有配置被上传,我将 Syncthing 开源项目配套的面板配置进行了修改,并上传至了 GitHub。
将这个 JSON 配置中的所有内容复制,然后使用 Grafana 导入配置的方式,在导入配置的文本框中粘贴进去上面的内容,Syncthing 的监控面板就搞定了。
NextCloud 的搭建以及监控配置
上篇文章中想偷个懒,直接使用了之前为国际学术顶会使用的 NextCloud 方案。但是有同学提出“我只有少量用户(比如自己)使用 NextCloud,能否不使用独立的数据库,使用轻量的 SQLite ,节约一些系统资源”。
答案是可以的, NextCloud 默认支持使用 SQLite 进行数据存储,在注意定期备份数据的前提下,作为自用的方案问题不大。
NextCloud 单人使用简单配置
为了让同学们能偷个懒,这里先补充一个 NextCloud 的简单配置,完整配置已上传至 GitHub:
version: "3.6"

services:

  nextcloud:
    image: ${DOCKER_NEXTCLOUD_IMAGE_NAME}
    container_name: ${DOCKER_NEXTCLOUD_HOSTNAME}
    restart: always
    expose:
      - 80
    volumes:
      # Linux 环境下使用
      # - /etc/localtime:/etc/localtime:ro
      # - /etc/timezone:/etc/timezone:ro
      - ./data:/var/www/html:rw
    extra_hosts:
      - "${DOCKER_NEXTCLOUD_DOMAIN}:127.0.0.1"
    networks:
      - traefik
    labels:
      - "traefik.enable=true"
      - "traefik.docker.network=traefik"
      - "traefik.http.routers.www-nextcloud.entrypoints=http"
      - "traefik.http.routers.www-nextcloud.rule=Host(`${DOCKER_NEXTCLOUD_DOMAIN}`)"
      - "traefik.http.routers.ssl-nextcloud.entrypoints=https"
      - "traefik.http.routers.ssl-nextcloud.tls=true"
      - "traefik.http.routers.ssl-nextcloud.rule=Host(`${DOCKER_NEXTCLOUD_DOMAIN}`)"
      - "traefik.http.services.www-nextcloud-backend.loadbalancer.server.scheme=http"
      - "traefik.http.services.www-nextcloud-backend.loadbalancer.server.port=80"
    logging:
        driver: "json-file"
        options:
            max-size: "1m"
networks:
  traefik:
    external: true
以及这个配置需要使用的 .env 环境变量:
# == nextcloud
DOCKER_NEXTCLOUD_IMAGE_NAME=nextcloud:22.2.0
DOCKER_NEXTCLOUD_HOSTNAME=nextcloud.storage.lab.com
DOCKER_NEXTCLOUD_DOMAIN=nextcloud.storage.lab.com
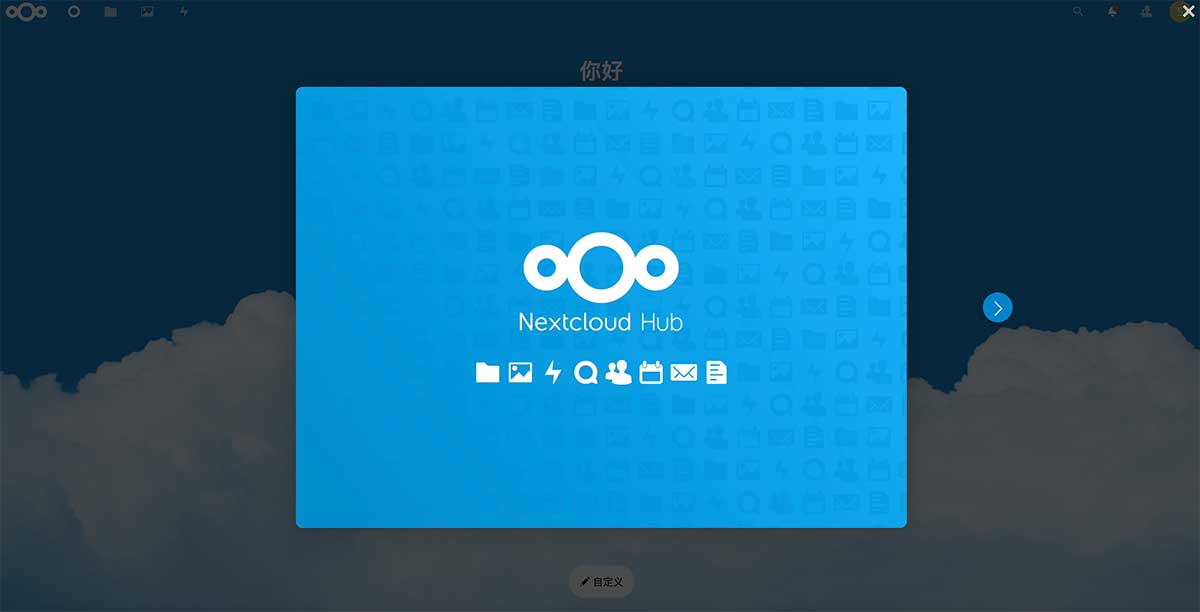
使用 docker-compose up -d 启动服务,然后在浏览器中打开我们配置好的域名 nextcloud.storage.lab.com 就能够开始 NextCloud 的配置安装了。完成安装(初始化)之后,就能够看到久违的欢迎界面啦。
配置 NextCloud 的性能指标服务
在 NextCloud 服务就绪之后,因为 NextCloud 和 Syncthing 一样,本身并不直接支持使用 Prometheus 进行数据采集。所以,我们同样需要为它创建一个 Exporter 服务。先在 NextCloud 使用的环境变量 .env 文件中,继续添加需要使用的配置(使用你自己的应用账号和密码替换下面配置中的内容):
# == exporter
DOCKER_EXPORTER_IMAGE_NAME=xperimental/nextcloud-exporter
DOCKER_EXPORTER_USER=soulteary
DOCKER_EXPORTER_PASS=soulteary
DOCKER_EXPORTER_DOMAIN=nextcloud-exporter.storage.lab.com
接着,编写 Exporter 需要使用到的容器配置:
version: "3.6"

services:

  nextcloud-exporter:
    image: ${DOCKER_EXPORTER_IMAGE_NAME}
    restart: always
    environment:
      NEXTCLOUD_SERVER: http://${DOCKER_NEXTCLOUD_DOMAIN}
      NEXTCLOUD_USERNAME: ${DOCKER_EXPORTER_USER}
      NEXTCLOUD_PASSWORD: ${DOCKER_EXPORTER_PASS}
      NEXTCLOUD_TIMEOUT: 5s
    expose:
      - 9205
    networks:
      - traefik
    labels:
      - "traefik.enable=true"
      - "traefik.docker.network=traefik"
      - "traefik.http.routers.http-nextcloud-exporter.entrypoints=http"
      - "traefik.http.routers.http-nextcloud-exporter.rule=Host(`${DOCKER_EXPORTER_DOMAIN}`)"
      - "traefik.http.routers.nextcloud-exporter.entrypoints=https"
      - "traefik.http.routers.nextcloud-exporter.tls=true"
      - "traefik.http.routers.nextcloud-exporter.rule=Host(`${DOCKER_EXPORTER_DOMAIN}`)"
      - "traefik.http.services.nextcloud-exporter-backend.loadbalancer.server.scheme=http"
      - "traefik.http.services.nextcloud-exporter-backend.loadbalancer.server.port=9205"
    logging:
        driver: "json-file"
        options:
            max-size: "1m"
networks:
  traefik:
    external: true
然后,使用 docker-compose -f docker-compose.exporter.yml up -d 启动服务。
我们同样使用命令检查一下服务的可用性:
curl http://nextcloud-exporter.storage.lab.com/metrics
不出意外,会看到“熟悉”的日志:
# HELP go_gc_duration_seconds A summary of the pause duration of garbage collection cycles.
# TYPE go_gc_duration_seconds summary
go_gc_duration_seconds{quantile="0"} 0.000185922
go_gc_duration_seconds{quantile="0.25"} 0.000185922
go_gc_duration_seconds{quantile="0.5"} 0.000224615
go_gc_duration_seconds{quantile="0.75"} 0.000224615
go_gc_duration_seconds{quantile="1"} 0.000224615
go_gc_duration_seconds_sum 0.000410537
go_gc_duration_seconds_count 2
# HELP go_goroutines Number of goroutines that currently exist.
# TYPE go_goroutines gauge
go_goroutines 9
# HELP go_info Information about the Go environment.
# TYPE go_info gauge
go_info{version="go1.15.3"} 1
# HELP go_memstats_alloc_bytes Number of bytes allocated and still in use.
# TYPE go_memstats_alloc_bytes gauge
go_memstats_alloc_bytes 3.402328e+06
# HELP go_memstats_alloc_bytes_total Total number of bytes allocated, even if freed.
# TYPE go_memstats_alloc_bytes_total counter
go_memstats_alloc_bytes_total 7.031024e+06
# HELP go_memstats_buck_hash_sys_bytes Number of bytes used by the profiling bucket hash table.
# TYPE go_memstats_buck_hash_sys_bytes gauge
go_memstats_buck_hash_sys_bytes 1.446245e+06
# HELP go_memstats_frees_total Total number of frees.
# TYPE go_memstats_frees_total counter
go_memstats_frees_total 31048
...
配置 Prometheus 抓取 NextCloud 性能指标数据
第三次重复操作,应该轻车熟路了吧 : D。继续编辑 config/prometheus.yml 配置文件:
  - job_name: nextcloud
    scrape_interval: 10s
    metrics_path: /metrics
    scheme: http
    static_configs:
      - targets: ['nextcloud-exporter.storage.lab.com']
使用 docker-compose down && docker-compose up -d 重启 Prometheus,然后在浏览器中访问:http://monitor.lab.com:9090/targets,确认列表中包含新配置的 NextCloud 的数据源。

为 NextCloud 配置 Grafana 监控面板
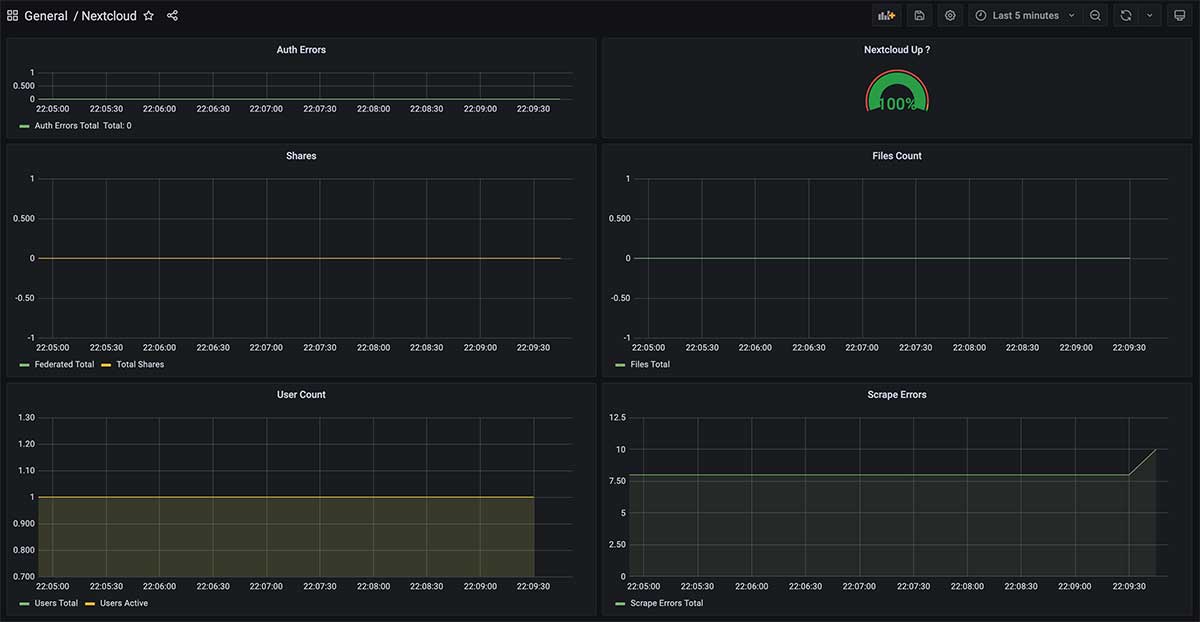
NextCloud Exporter 的开源项目贡献者提供了一个现成的面板,所以相比较 Syncthing 而言,配置监控面板的操作会简单不少。
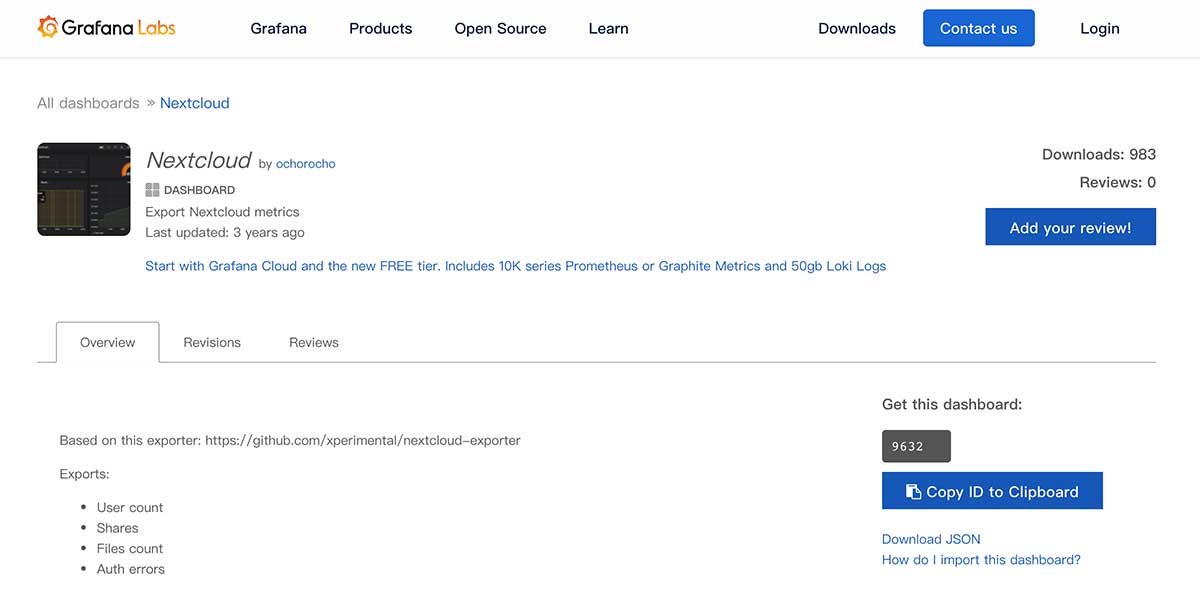
还是参考监控篇中的“Grafana 控制面板导入”方式,将编号“9632”的面板导入 Grafana 中,我们就可以看到类似下面的面板界面啦。
最后
在写“装在笔记本里的私有云环境”这个系列的内容时,稍不注意文章字数(包含代码)就会超过各种平台允许最大字数,所以不得已将本篇文章进行了分拆。
迄今为止,我们已经几乎完成了全部存储服务的搭建,以及监控配置,下一篇文章中,我将会继续展开聊聊“数据备份”以及上篇文章中提到的典型的网络存储应用的搭建和使用。
–EOF