本篇文章分享一个小技巧,如何直接将你的设备的终端通过“浏览器”进行分享。
写在前面
最近 AI 领域不仅模型大热,上手成本也大幅下降,不少同学纷纷踏上了模型推理、微调、甚至开启了炼丹之路。我有一位没有开发的朋友也对上面这些事情产生了浓烈的兴趣,希望亲自动手试试看。
以往我会推荐新手上路使用 Colab,但考虑到 Colab 或类 JupyterHub 对于小白用户,其实也有一定的上手的产品门槛,而且还有付费、网络等乱七八糟的麻烦事情,命令行终端不能非常方便的进行并行程序或任务的执行。
所以,综合考虑之后,临时申请了一台云服务器资源,使用自由度极高、响应也快。不过,默认的云服务除了安装好显卡驱动之外,基本没有可以提供界面服务的程序,如果我们的“小白同学”想使用服务器,首先需要学会使用本地的终端,生成登录密钥,进行 SSH 登录,未免太麻烦了(服务器安全组策略禁止密码登录)。
如果我们能够让小白同学在使用终端的时候,就和浏览网页一样,免去一些初学者的不必要的麻烦,岂不是很好嘛?
想要完成上面的效果,需要几个开源软件的组合使用,下面我们先来介绍第一个软件:ttyd。
本文使用的配置文件,已在soulteary/Home-Network-Note/minimal/console/web-ssh 开源分享,有需要可以自取。
开源 Web 命令行工具:ttyd
我曾经在之前的文章中曾简单介绍和使用过一个开源工具 tsl0922/ttyd,它可以将我们的设备上的终端会话操作和内容通过 WebSocket 的方式同步到浏览器中,而免去了新手所需要的 SSH 相关的登录等操作。
ttyd 的安装方式有很多种,我选择从官方发布页面直接下载构建好的二进制文件。在下载的时候,根据需要分享终端会话的设备的 CPU 类型,选择不同类型的二进制文件。
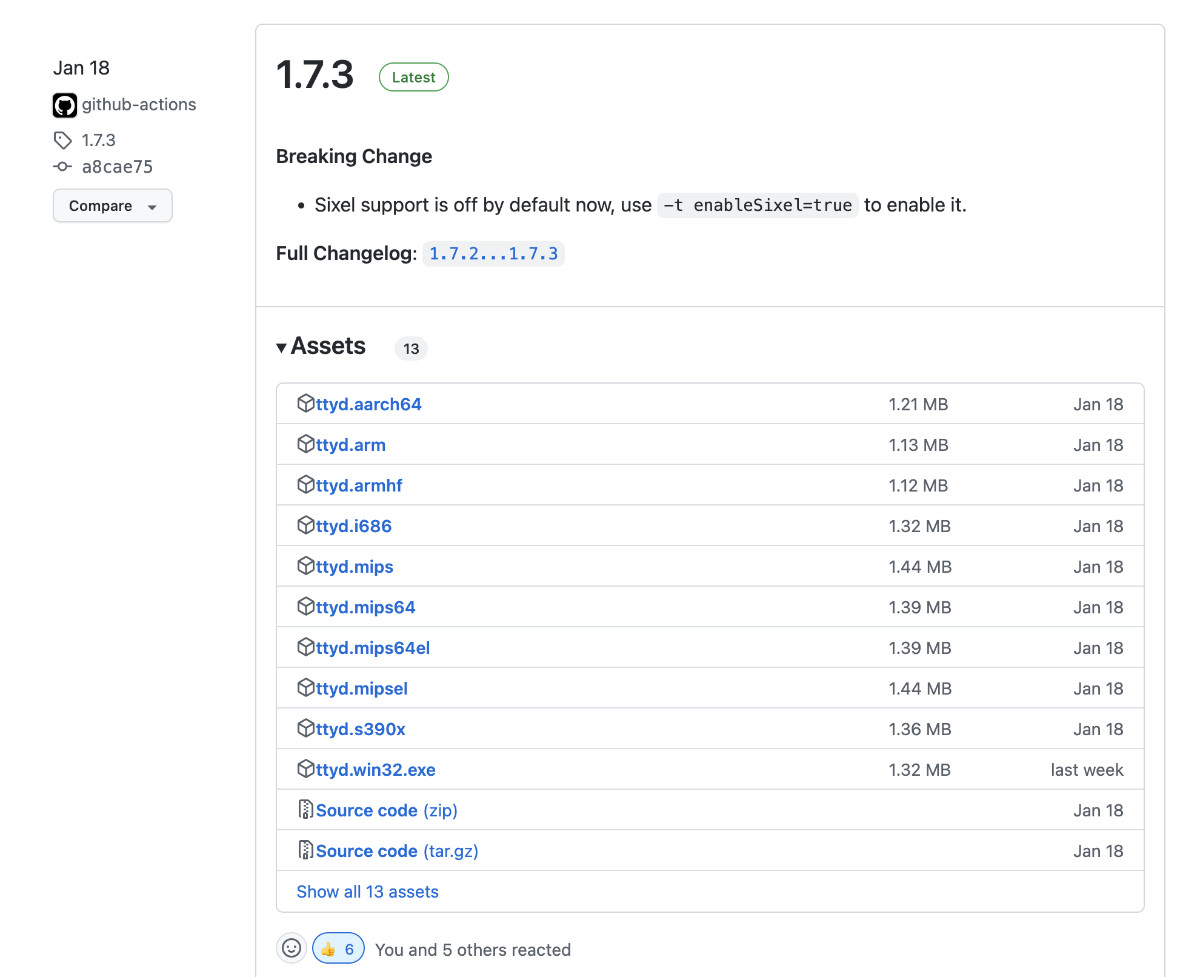
比如,我们可以从官方下载目前最新的版本 1.7.3:
sudo curl -sL -o /usr/local/bin/ttyd "https://github.com/tsl0922/ttyd/releases/download/1.7.3/ttyd.i686"
sudo chmod +x /usr/local/bin/ttyd
当文件下载完毕之后,执行 command ttyd,将能够看到完整的帮助信息,以及确认文件下载正确:
# command ttyd
ttyd is a tool for sharing terminal over the web

USAGE:
    ttyd [options] <command> [<arguments...>]

VERSION:
    1.7.3-a8cae75

OPTIONS:
    -p, --port              Port to listen (default: 7681, use `0` for random port)
    -i, --interface         Network interface to bind (eg: eth0), or UNIX domain socket path (eg: /var/run/ttyd.sock)
    -U, --socket-owner      User owner of the UNIX domain socket file, when enabled (eg: user:group)
    -c, --credential        Credential for basic authentication (format: username:password)
    -H, --auth-header       HTTP Header name for auth proxy, this will configure ttyd to let a HTTP reverse proxy handle authentication
    -u, --uid               User id to run with
    -g, --gid               Group id to run with
    -s, --signal            Signal to send to the command when exit it (default: 1, SIGHUP)
    -w, --cwd               Working directory to be set for the child program
    -a, --url-arg           Allow client to send command line arguments in URL (eg: http://localhost:7681?arg=foo&arg=bar)
    -R, --readonly          Do not allow clients to write to the TTY
    -t, --client-option     Send option to client (format: key=value), repeat to add more options
    -T, --terminal-type     Terminal type to report, default: xterm-256color
    -O, --check-origin      Do not allow websocket connection from different origin
    -m, --max-clients       Maximum clients to support (default: 0, no limit)
    -o, --once              Accept only one client and exit on disconnection
    -B, --browser           Open terminal with the default system browser
    -I, --index             Custom index.html path
    -b, --base-path         Expected base path for requests coming from a reverse proxy (eg: /mounted/here, max length: 128)
    -P, --ping-interval     Websocket ping interval(sec) (default: 5)
    -6, --ipv6              Enable IPv6 support
    -S, --ssl               Enable SSL
    -C, --ssl-cert          SSL certificate file path
    -K, --ssl-key           SSL key file path
    -A, --ssl-ca            SSL CA file path for client certificate verification
    -d, --debug             Set log level (default: 7)
    -v, --version           Print the version and exit
    -h, --help              Print this text and exit

Visit https://github.com/tsl0922/ttyd to get more information and report bugs.
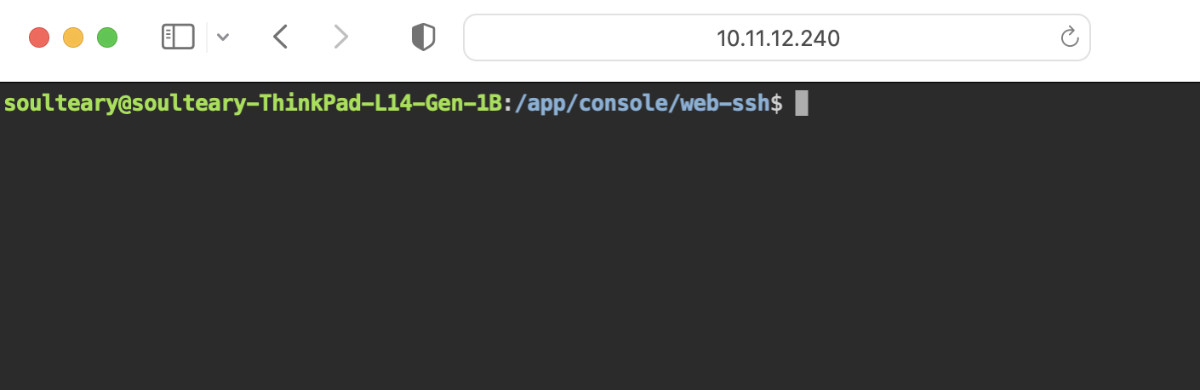
想要将我们的终端通过网页服务的方式共享,其实很简单,只需要输入类似下面的命令,就能够通过在浏览器访问设备的 IP 地址加“8080”端口,来直接使用设备啦:
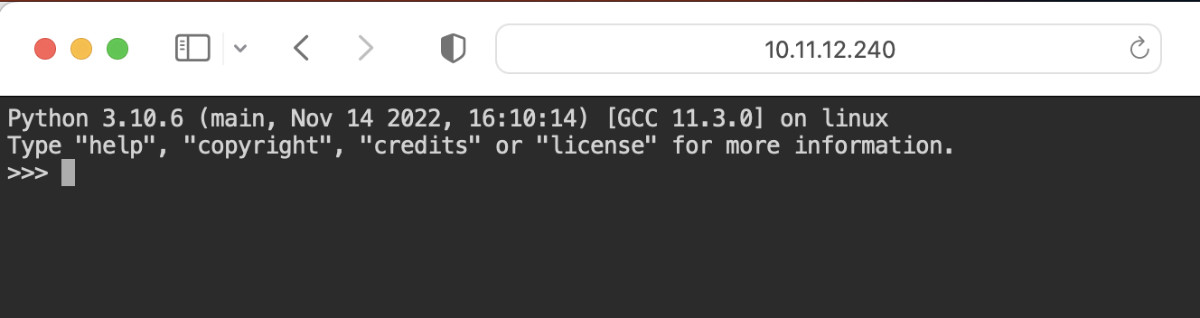
ttyd -p 8080 bash
命令执行完毕,我们打开浏览器,比如(10.11.12.240:8080),将看到类似下面的界面:
你可以将 bash 替换成 zsh 等你喜欢的 Shell,甚至替换成支持交互式的编程语言解析器,比如 Python:
关于其他的技巧,我们后面的文章再聊,来聊聊还需要配置的其他的开源软件吧。
进程守护工具:Supervisor
为了保证这个 Web 终端进程能够稳定、持续的运行,我们可以使用一个老朋友,在之前的文章诸如:《聊聊群晖的进程守护》、《Mac OSX 开机启动应用 (supervisor)》中,也曾提到过它。
Supervisor 从 2004 年推出维护至今,是 Linux 体系下非常重要和著名的进程监控和启动管理应用。它的安装非常简单:
# Ubuntu / Debian
apt-get install supervisor -y
# macOS / Linux
brew install supervisor
# PiPy
pip install supervisor
在完成安装之后,如果是 Linux 操作系统,我们一般可以在 /etc/supervisor/supervisord.conf 找到它的配置文件,至于群晖或者 macOS 可以参考本小节开头引用的文章。查看配置文件,我们可以得到 supervisor 的配置目录:
# cat /etc/supervisor/supervisord.conf

; supervisor config file

....

[include]
files = /etc/supervisor/conf.d/*.conf
接着,我们可以在配置文件里声明的配置目录中,创建我们需要的自动启动和保持运行的服务配置,比如创建一个文件 /etc/supervisor/conf.d/ttyd.conf:
[program:ttyd]
directory = /root/
command = ttyd -p 8080 zsh
autostart = true
startsecs = 10
autorestart = true
startretries = 100000
stdout_logfile = /tmp/ttyd.log
创建完配置之后,我们执行 sudo service supervisor restart 重启服务,就能够模拟和验证设备重新启动时,ttyd 是否也被自动启动起来啦。
# ps -ef | grep ttyd
root     1152948 1152944  0 11:34 ?        00:00:00 ttyd -p 8080 zsh
使用 ps 查看运行进程,发现进程已经正常启动啦,使用浏览器访问 IP:8080 看到服务也正常。然后我们来模拟下意外事件,程序异常退出,比如强制干掉已经在运行的进程:
sudo kill -9 1152948
然后我们再次使用 ps 检查进程是否运行,能够看到进程再次重新启动,简单的验证就完毕啦。
# ps -ef | grep ttyd
root     1156418 1152944  0 11:36 ?        00:00:00 ttyd -p 8080 zsh
如果你的服务跑在内网,只有你或者你的朋友使用,那么到这一步就够了。但如果你的服务需要暴露在网上,我们还需要做一些简单的安全加固,以及通过最后一个软件来让 Web 服务的访问更可靠。
使用 Docker 和 Nginx 添加简单可靠的认证功能
相比较在系统中直接安装 Nginx,我更倾向于在容器中使用它,能够显式的看到它所有依赖的文件和配置。毕竟,它和 ttyd 不同,走江湖不是一个人,带着各种兄弟姐妹:动态链接库、一大堆配置文件。
在引入了 Nginx 之后,我们就不必再让 ttyd 来监听端口提供 Web 服务了,上文中的配置和启动命令,可以调整为下面这样:
[program:ttyd]
directory = /root/
command = ttyd -i /tmp/ttyd.sock -H X-WEBAUTH-USER zsh
autostart = true
startsecs = 10
autorestart = true
startretries = 100000
stdout_logfile = /tmp/ttyd.log
Nginx 认证功能,可以借助 Nginx 内置的 auth_basic 指令,想要使用这个功能,我们需要创建符合要求的“账号、密码”配置文件,借助 Docker 和 htpasswd ,可以很轻松的生成符合要求的配置内容,以生成账号 soulteary,密码 yourpassword 为例:
# docker run --rm -it httpd:alpine htpasswd -nb soulteary yourpassword
soulteary:$apr1$XbCGhQ3K$gafYN1KkZhXpdTgnTxI8w0
在命令后添加管道符,就能够自动将配置保存在本地了。
docker run --rm -it httpd:alpine htpasswd -nb soulteary yourpassword >> .htpasswd
接下来,我们来编写 Nginx 的配置文件 nginx.conf:
user root;
worker_processes auto;

error_log /var/log/nginx/error.log notice;
pid /var/run/nginx.pid;

events {
    worker_connections 1024;
}

http {
    server {
        listen 80;
        server_name localhost;

        location / {
            auth_basic "Hello World";
            auth_basic_user_file /etc/.htpasswd;

            proxy_set_header X-WEBAUTH-USER $remote_user;
            proxy_set_header Authorization "";

            proxy_http_version 1.1;
            proxy_set_header Host $host;
            proxy_set_header X-Forwarded-Proto $scheme;
            proxy_set_header X-Forwarded-For $proxy_add_x_forwarded_for;
            proxy_set_header Upgrade $http_upgrade;
            proxy_set_header Connection "upgrade";

            proxy_pass http://unix:/tmp/ttyd.sock;
        }
    }
}
以及,编写 docker-compose.yml:
version: "3.8"

services:
  nginx-ssh:
    image: nginx:1.23.3
    restart: always
    ports:
      - 0.0.0.0:8080:80
    volumes:
      - /etc/localtime:/etc/localtime:ro
      - /etc/timezone:/etc/timezone:ro
      - ./nginx.conf:/etc/nginx/nginx.conf
      - ./.htpasswd:/etc/.htpasswd
      - /tmp/ttyd.sock:/tmp/ttyd.sock:rw
    environment:
      - NGINX_ENTRYPOINT_QUIET_LOGS=1
将文件都保存完毕之后,使用 docker compose up -d 启动服务,在浏览器中再次打开设备的 IP:8080 就能看到基础的认证对话框啦。
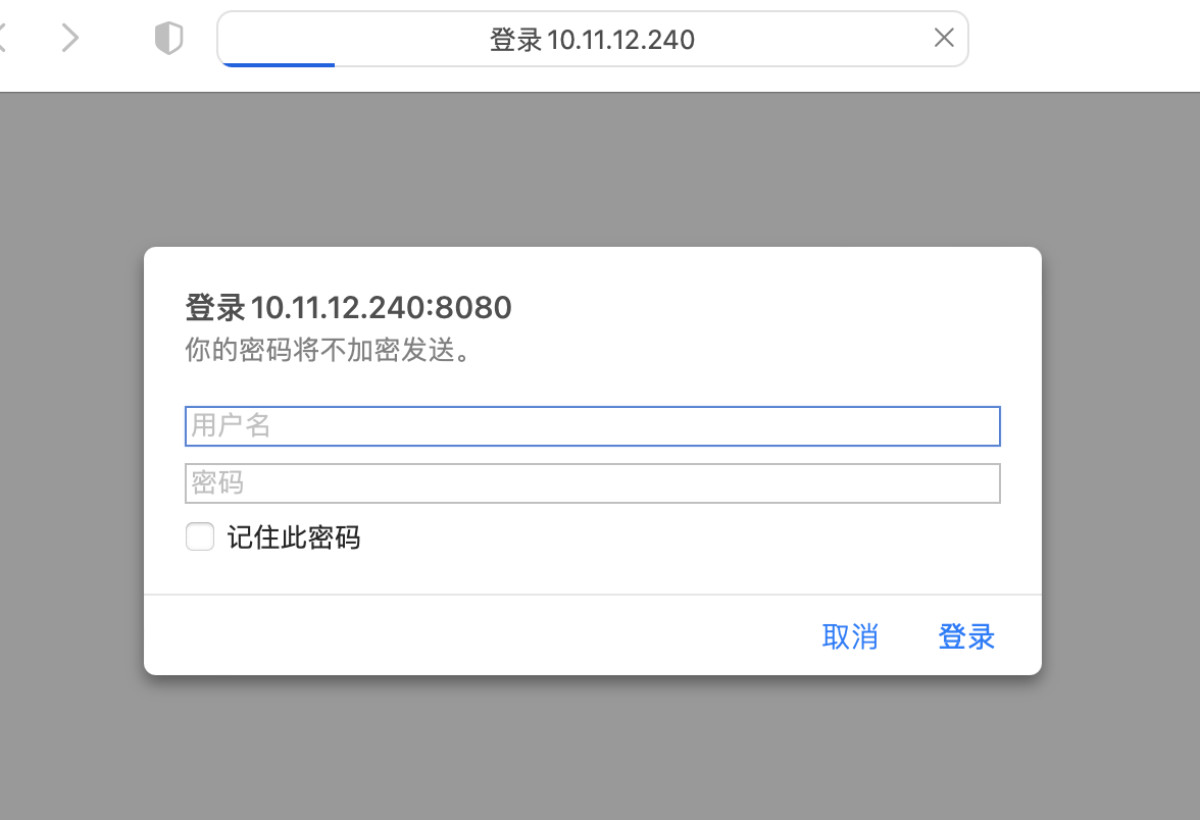
只有当用户正确输入我们在上文中生成的账号密码,才能够访问和使用这个 Web Terminal,是不是用起来相对放心了一些呢?
其他:和 Traefik 结合使用
和 Traefik 结合使用的配置,我也一同上传分享到了 GitHub,有需要可以自取:soulteary/Home-Network-Note/minimal/console/web-ssh。
关于 Traefik 的分享,过往文章有很多,可以自行翻阅。
最后
使用 ttyd 可以做的事情有很多,在过去几年里实践了不少有趣的东西,比如:一个接近零成本的多用户堡垒机,可以在各种设备里直接运行的远程维护终端,一个轻量的实时日志查询工具…
先写到这里,后面有机会再分享其他的玩法。
–EOF