本篇文章,我们聊聊如何使用 Docker 容器快速上手 Meta AI 出品的 LLaMA2 开源大模型。
写在前面
昨天特别忙,早晨申请完 LLaMA2 模型下载权限后,直到晚上才顾上折腾了一个 Docker 容器运行方案,都没来得及写文章来聊聊这个容器怎么回事,以及怎么使用。
所以,现在就来聊聊如何快速上手 LLaMA2 官方版本的大模型。

完整的开源项目代码,我上传到了 soulteary/docker-llama2-chat,有需要的同学可以自取。
先来一起做下准备工作吧。
准备工作
准备工作中,主要有两步:准备模型文件和模型运行环境。
关于模型运行环境,我们在之前的文章《基于 Docker 的深度学习环境:入门篇》中聊过,就不赘述了,还不熟悉的同学可以阅读参考。
只要你安装好 Docker 环境,配置好能够在 Docker 容器中调用显卡的基础环境,就可以进行下一步啦。
模型下载
想要愉快的进行 LLaMA2 的本地部署,我们首先需要申请模型文件的下载许可,目前一共有两个地方可以申请:Meta AI 官方网站和 Meta 在 HuggingFace 的模型页面。
不论选择哪一种方式,在申请之后,稍等片刻,我们都将收到审核通过邮件,然后刷新页面,就可以进行模型下载啦。

HuggingFace 的模型下载速度比 Meta AI 官网快一些,所以我们侧重聊如何从 HuggingFace 准备我们所需要的模型。
从 HuggingFace 获取模型文件
我们能从 HuggingFace 上获取到的模型一共有两种模型(原始基础模型和 Chat 模型);以及在 HuggingFace 平台上,它们分别被保存为了两种格式:PyTorch Pickle 格式和 HuggingFace SafeTensors 格式。
如果你也使用 HuggingFace 全家桶,我强烈推荐后一种格式:面向未来,方便可靠,加载性能也更强(快)。
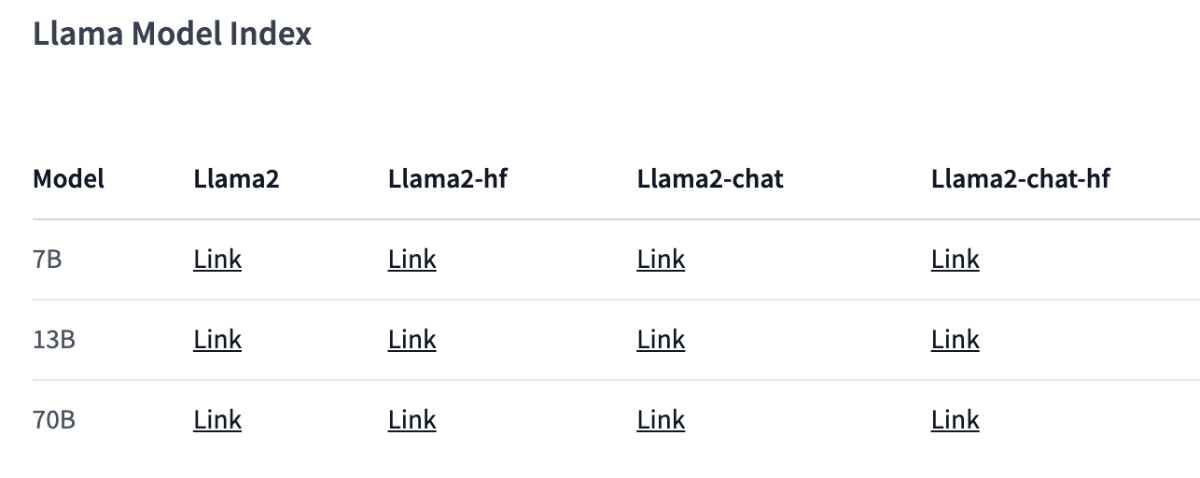
为了方便演示和得到一个还凑合的体验效果,本文中,我们采用 “LLaMA2-Chat-HF” 版本的模型,你可以在下面的地址申请模型下载授权:
- https://huggingface.co/llamaste/Llama-2-7b-chat-hf
- https://huggingface.co/llamaste/Llama-2-13b-hf
- https://huggingface.co/llamaste/Llama-2-70b-hf
其中 7B 和 13B 版本的模型,我们能够在普通家用显卡中跑起来(大概使用 10G~14G显存)。
当下载授权审核通过之后,我们可以使用下面的命令,来分别根据你的需求下载下面的三个模型:
# 本地需要按照 Git LFS,https://git-lfs.com
# 安装完毕,进行初始化
git lfs install

# 下载 7B 模型
git clone https://huggingface.co/meta-llama/Llama-2-7b-chat-hf

# 下载 13B 模型
git clone https://huggingface.co/meta-llama/Llama-2-13b-chat-hf

# 下载 70B 模型
git clone https://huggingface.co/meta-llama/Llama-2-70b-chat-hf
等待我们选择的模型下载完后,调整下目录结构:
# 创建一个新的目录,用于存放我们的模型
mkdir meta-llama

# 将下载好的模型移动到目录中
mv Llama-2-7b-chat-hf meta-llama/
mv Llama-2-13b-chat-hf meta-llama/
mv Llama-2-70b-chat-hf meta-llama/
完整的目录结构类似下面这样,所有的模型都在我们创建的 meta-llama 目录的下一级中:
# tree -L 2 meta-llama
meta-llama
├── Llama-2-13b-chat-hf
│   ├── added_tokens.json
│   ├── config.json
│   ├── generation_config.json
│   ├── LICENSE.txt
│   ├── model-00001-of-00003.safetensors
│   ├── model-00002-of-00003.safetensors
│   ├── model-00003-of-00003.safetensors
│   ├── model.safetensors.index.json
│   ├── pytorch_model-00001-of-00003.bin
│   ├── pytorch_model-00002-of-00003.bin
│   ├── pytorch_model-00003-of-00003.bin
│   ├── pytorch_model.bin.index.json
│   ├── README.md
│   ├── Responsible-Use-Guide.pdf
│   ├── special_tokens_map.json
│   ├── tokenizer_config.json
│   ├── tokenizer.model
│   └── USE_POLICY.md
└── Llama-2-7b-chat-hf
    ├── added_tokens.json
    ├── config.json
    ├── generation_config.json
    ├── LICENSE.txt
    ├── model-00001-of-00002.safetensors
    ├── model-00002-of-00002.safetensors
    ├── model.safetensors.index.json
    ├── models--meta-llama--Llama-2-7b-chat-hf
    ├── pytorch_model-00001-of-00003.bin
    ├── pytorch_model-00002-of-00003.bin
    ├── pytorch_model-00003-of-00003.bin
    ├── pytorch_model.bin.index.json
    ├── README.md
    ├── special_tokens_map.json
    ├── tokenizer_config.json
    ├── tokenizer.json
    ├── tokenizer.model
    └── USE_POLICY.md
上面的内容都准备好后,我们开始准备运行模型。
启动模型应用程序
使用下面的命令,下载 Docker LLaMA2 Chat 模型应用程序文件:
git clone https://github.com/soulteary/docker-llama2-chat.git
等待程序下载完毕后,我们进入程序目录,然后开始构建我们所需要的模型容器镜像:
# 进入程序目录
cd docker-llama2-chat
# 构建 7B 镜像
bash scripts/make-7b.sh
# 或者,构建 13B 镜像
bash scripts/make-13b.sh
耐心等待镜像构建完毕后,我们将之前准备好的存放着模型的 meta-llama 目录,移动到当前程序目录中,然后选择要启动的模型程序即可:
# 运行 7B 镜像,应用程序
bash scripts/run-7b.sh
# 或者,运行 13B 镜像,应用程序
bash scripts/run-13b.sh
命令执行后,如果一切顺利,你将看到类似下面的日志:
=============
== PyTorch ==
=============

NVIDIA Release 23.06 (build 63009835)
PyTorch Version 2.1.0a0+4136153

Container image Copyright (c) 2023, NVIDIA CORPORATION & AFFILIATES. All rights reserved.

Copyright (c) 2014-2023 Facebook Inc.
Copyright (c) 2011-2014 Idiap Research Institute (Ronan Collobert)
Copyright (c) 2012-2014 Deepmind Technologies    (Koray Kavukcuoglu)
Copyright (c) 2011-2012 NEC Laboratories America (Koray Kavukcuoglu)
Copyright (c) 2011-2013 NYU                      (Clement Farabet)
Copyright (c) 2006-2010 NEC Laboratories America (Ronan Collobert, Leon Bottou, Iain Melvin, Jason Weston)
Copyright (c) 2006      Idiap Research Institute (Samy Bengio)
Copyright (c) 2001-2004 Idiap Research Institute (Ronan Collobert, Samy Bengio, Johnny Mariethoz)
Copyright (c) 2015      Google Inc.
Copyright (c) 2015      Yangqing Jia
Copyright (c) 2013-2016 The Caffe contributors
All rights reserved.

Various files include modifications (c) NVIDIA CORPORATION & AFFILIATES.  All rights reserved.

This container image and its contents are governed by the NVIDIA Deep Learning Container License.
By pulling and using the container, you accept the terms and conditions of this license:
https://developer.nvidia.com/ngc/nvidia-deep-learning-container-license

WARNING: CUDA Minor Version Compatibility mode ENABLED.
  Using driver version 525.105.17 which has support for CUDA 12.0.  This container
  was built with CUDA 12.1 and will be run in Minor Version Compatibility mode.
  CUDA Forward Compatibility is preferred over Minor Version Compatibility for use
  with this container but was unavailable:
  [[Forward compatibility was attempted on non supported HW (CUDA_ERROR_COMPAT_NOT_SUPPORTED_ON_DEVICE) cuInit()=804]]
  See https://docs.nvidia.com/deploy/cuda-compatibility/ for details.

Loading checkpoint shards: 100%|████████████████████████████████████████████████████████████████████████████████████████████████████████████████████████████████████████| 2/2 [00:05<00:00,  2.52s/it]
Caching examples at: '/app/gradio_cached_examples/20'
Caching example 1/5
/usr/local/lib/python3.10/dist-packages/transformers/generation/utils.py:1270: UserWarning: You have modified the pretrained model configuration to control generation. This is a deprecated strategy to control generation and will be removed soon, in a future version. Please use a generation configuration file (see https://huggingface.co/docs/transformers/main_classes/text_generation )
  warnings.warn(
Caching example 2/5
Caching example 3/5
Caching example 4/5
Caching example 5/5
Caching complete

/usr/local/lib/python3.10/dist-packages/gradio/utils.py:839: UserWarning: Expected 7 arguments for function <function generate at 0x7f3e096a1000>, received 6.
  warnings.warn(
/usr/local/lib/python3.10/dist-packages/gradio/utils.py:843: UserWarning: Expected at least 7 arguments for function <function generate at 0x7f3e096a1000>, received 6.
  warnings.warn(
Running on local URL:  http://0.0.0.0:7860

To create a public link, set `share=True` in `launch()`.
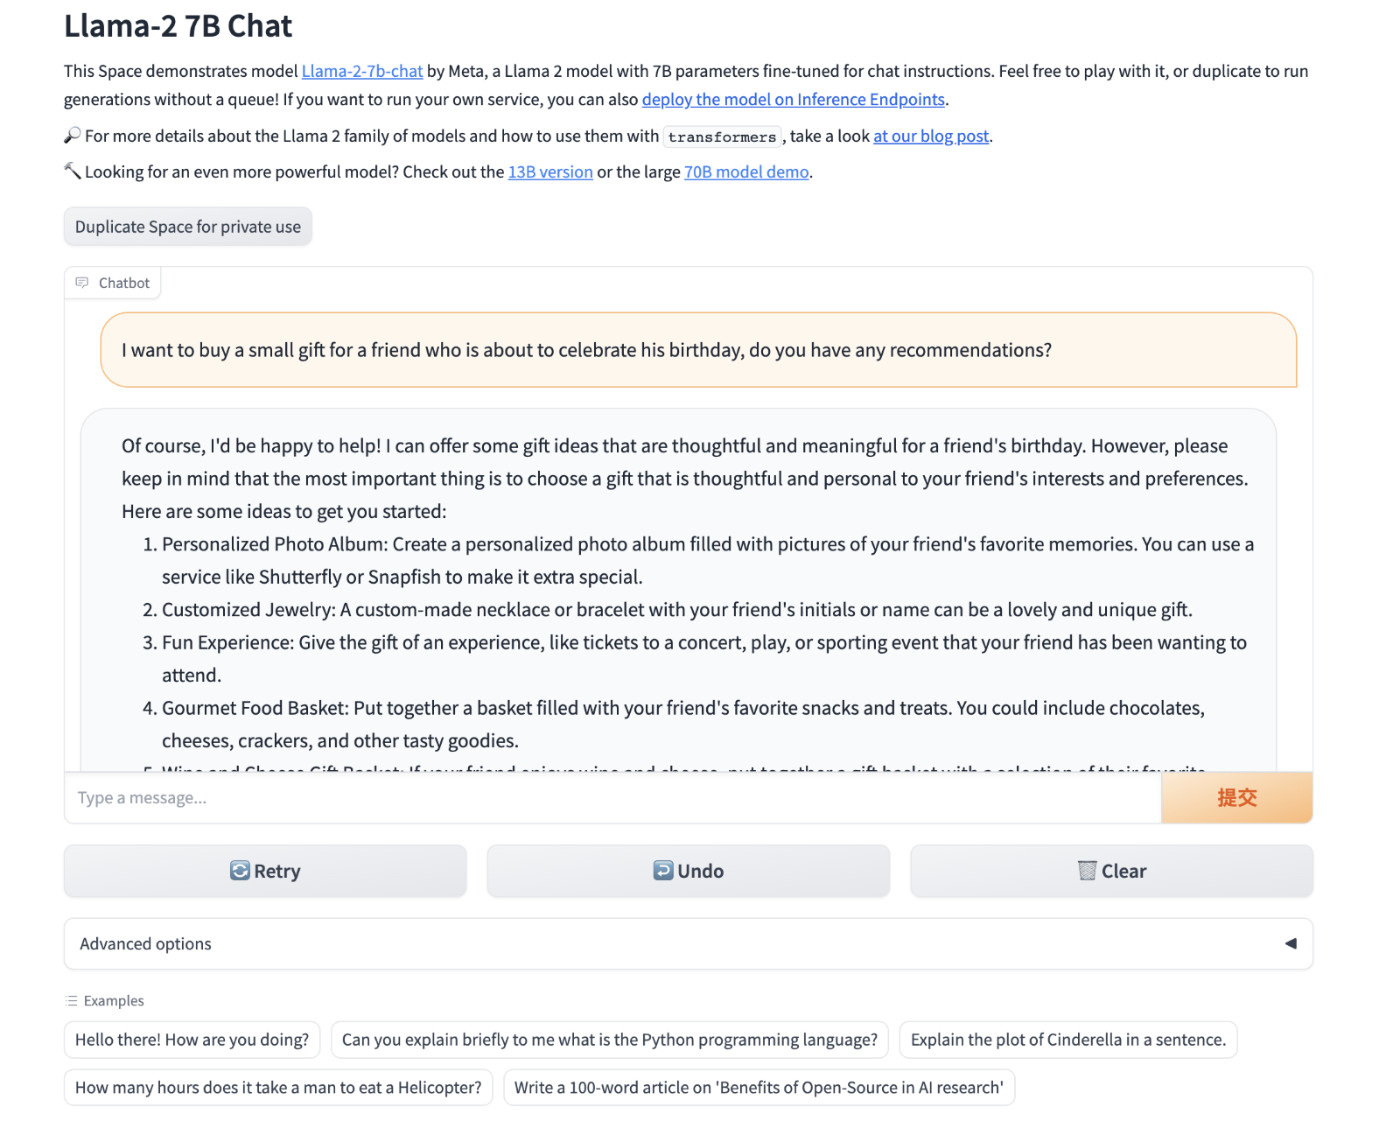
接着,我们使用浏览器打开 http://localhost:7860 或者 http://你的IP:7860 就能够开始体验 LLaMA2 Chat 模型啦。
显存使用情况
7B 模型实际运行起来,会占用 13 G 左右显存。
+-----------------------------------------------------------------------------+
| NVIDIA-SMI 525.105.17   Driver Version: 525.105.17   CUDA Version: 12.0     |
|-------------------------------+----------------------+----------------------+
| GPU  Name        Persistence-M| Bus-Id        Disp.A | Volatile Uncorr. ECC |
| Fan  Temp  Perf  Pwr:Usage/Cap|         Memory-Usage | GPU-Util  Compute M. |
|                               |                      |               MIG M. |
|===============================+======================+======================|
|   0  NVIDIA GeForce ...  Off  | 00000000:01:00.0  On |                  Off |
| 31%   42C    P8    34W / 450W |  14158MiB / 24564MiB |      2%      Default |
|                               |                      |                  N/A |
+-------------------------------+----------------------+----------------------+

+-----------------------------------------------------------------------------+
| Processes:                                                                  |
|  GPU   GI   CI        PID   Type   Process name                  GPU Memory |
|        ID   ID                                                   Usage      |
|=============================================================================|
|    0   N/A  N/A      1414      G   /usr/lib/xorg/Xorg                103MiB |
|    0   N/A  N/A      1593      G   /usr/bin/gnome-shell               16MiB |
|    0   N/A  N/A      2772      C   python                          14034MiB |
+-----------------------------------------------------------------------------+
13B 模型运行起来,消耗显存 9G 左右。
+-----------------------------------------------------------------------------+
| NVIDIA-SMI 525.105.17   Driver Version: 525.105.17   CUDA Version: 12.0     |
|-------------------------------+----------------------+----------------------+
| GPU  Name        Persistence-M| Bus-Id        Disp.A | Volatile Uncorr. ECC |
| Fan  Temp  Perf  Pwr:Usage/Cap|         Memory-Usage | GPU-Util  Compute M. |
|                               |                      |               MIG M. |
|===============================+======================+======================|
|   0  NVIDIA GeForce ...  Off  | 00000000:01:00.0 Off |                  Off |
| 31%   44C    P2    70W / 450W |   9057MiB / 24564MiB |      0%      Default |
|                               |                      |                  N/A |
+-------------------------------+----------------------+----------------------+

+-----------------------------------------------------------------------------+
| Processes:                                                                  |
|  GPU   GI   CI        PID   Type   Process name                  GPU Memory |
|        ID   ID                                                   Usage      |
|=============================================================================|
|    0   N/A  N/A      1414      G   /usr/lib/xorg/Xorg                167MiB |
|    0   N/A  N/A      1593      G   /usr/bin/gnome-shell               16MiB |
|    0   N/A  N/A      4686      C   python                           8870MiB |
+-----------------------------------------------------------------------------+
好了,如果你只想了解如何使用模型,那么到这里就足够啦。
模型镜像的封装
接下来,我们来简单展开下上面的脚本中,都做了哪些工作。
封装这个 LLaMA2 Docker 镜像其实特别简单,和之前的模型相关的文章没有差别,我们基于 Nvidia 基础镜像,做一个简单的多阶段构建即可。
比如,我们可以先定义一个基础镜像,包含所有的模型程序运行需要的依赖文件:
ROM nvcr.io/nvidia/pytorch:23.06-py3
RUN pip config set global.index-url https://pypi.tuna.tsinghua.edu.cn/simple && \
    pip install accelerate==0.21.0 bitsandbytes==0.40.2 gradio==3.37.0 protobuf==3.20.3 scipy==1.11.1 sentencepiece==0.1.99 transformers==4.31.0
WORKDIR /app
然后,我们将上面的内容保存为 Dockerfile.base,接着使用 docker build -t soulteary/llama2:base . -f docker/Dockerfile.base 进行基础镜像的构建。
接着,我们准备好模型调用文件即可,相关的程序我上传到了 soulteary/docker-llama2-chat/llama2-7b 和 soulteary/docker-llama2-chat/llama2-13b,主要有两个文件构成,分别是 Gradio Web 交互界面,和模型加载运行程序。
编写模型应用程序镜像文件:
FROM soulteary/llama2:base
COPY llama2-7b/* ./
CMD ["python", "app.py"]
将上面的文件保存为 Dockerfile.7b 后,我买使用命令 docker build -t soulteary/llama2:7b . -f docker/Dockerfile.7b 完成应用镜像的构建。
最后,使用下面的命令,将程序跑起来就可以玩啦:
docker run --gpus all --ipc=host --ulimit memlock=-1 --ulimit stack=67108864 --rm -it -v `pwd`/meta-llama:/app/meta-llama -p 7860:7860 soulteary/llama2:7b
最后
本篇文章是 LLaMA2 相关的第一篇文章,短短几个月的时间,开源项目就能够取得这么快速的进步,还是挺令人欣慰和令人期待的。
LLaMA2 不是结束,而是新一轮的开始,开源的世界里,我们永远可以期待更强的家伙出现,不断逼进和挑战当前世界的王。
这篇文章的标题里隐藏着下一篇文章的线索,你猜得到吗?
–EOF